Brillot2000
Active Member
- Joined
- Mar 10, 2014
- Messages
- 1,485
- Reaction score
- 1
- Points
- 36
- Location
- Sun Valley, CA, U.S.A.
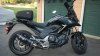
Went for a 136 mile ride with a few of my friends, see image below. Sure was a great day to go for a ride in and around SoCal!!! ")


Follow along with the video below to see how to install our site as a web app on your home screen.

Note: This feature currently requires accessing the site using the built-in Safari browser.


Mike,
Nice bracket, simple design. Not so large attachment to reduce ground clearance.
I like it.


I decided to copy what we used to do on our dirt bikes years and years ago. I made an extension out rubber.
I will test it a little to see how it holds up. I just used fender washers on the inside. I think it would have been better to use a strip of metal all the way across. It should keep the mud off the radiator. The price was right. I had all of the materials in my workshop.
I like your philosophy, I also am a fan of less is sometimes more! Keeping your bike simple, light weight and void of complicated attachments makes for a more reliable bike. Less crap to go haywire. I use the old fashion methods, paper maps, rubber non heated grips, cloth saddle and tail bags, stock lighting and hands on for cruise control, etc.Well, not *today*, but I have de-farkled the bike recently, i.e., removed:
a) The two mini "driving lights" (probably from SW Motech) that were hog-tied to the front blinker stalks and removed all associated wiring back to the battery.
b) The "mounting plate" for the heated grips control (Oxford), then removed the control and its wiring back to the battery.
...(will be removing the heated grips as soon as I find decent standard replacements).
c) Removed the accessory plug (the cigarette lighter style \ SW Motech) on the handlebar and its associated wiring back to the battery.
d) Removed Ram ball mount on the crossbar.
* Probably remove the SW Motech Hand Guards ... they bump into and flex the windscreen, although I might be able to readjust them so it doesn't touch the screen.
I like your philosophy, I also am a fan of less is sometimes more! Keeping your bike simple, light weight and void of complicated attachments makes for a more reliable bike. Less crap to go haywire. I use the old fashion methods, paper maps, rubber non heated grips, cloth saddle and tail bags, stock lighting and hands on for cruise control, etc.
I washed it,yes I really did I'm not going to get banned am I for this crime
the bike was absolutely splattered with dead flies and muck!
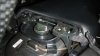
I installed a cannon-style (air / panasonic / monoprice) cam on my handlebars . I tried the turn signal and it was unstable.
Still getting vibes but not terrible. Considering helmet mount.
I washed my bike fir the third time in a year and a half. Surprised at how dirty it wasn't. I guess and the riding in the rain helps.