

dduelin
Site Supporter
I recently completed this service and took a few pictures along the way that might help another DIY mechanic. Brakes are a critical system and if you are not comfortable doing work on your brakes I urge you to take the bike to a Honda dealer or trusted shop.
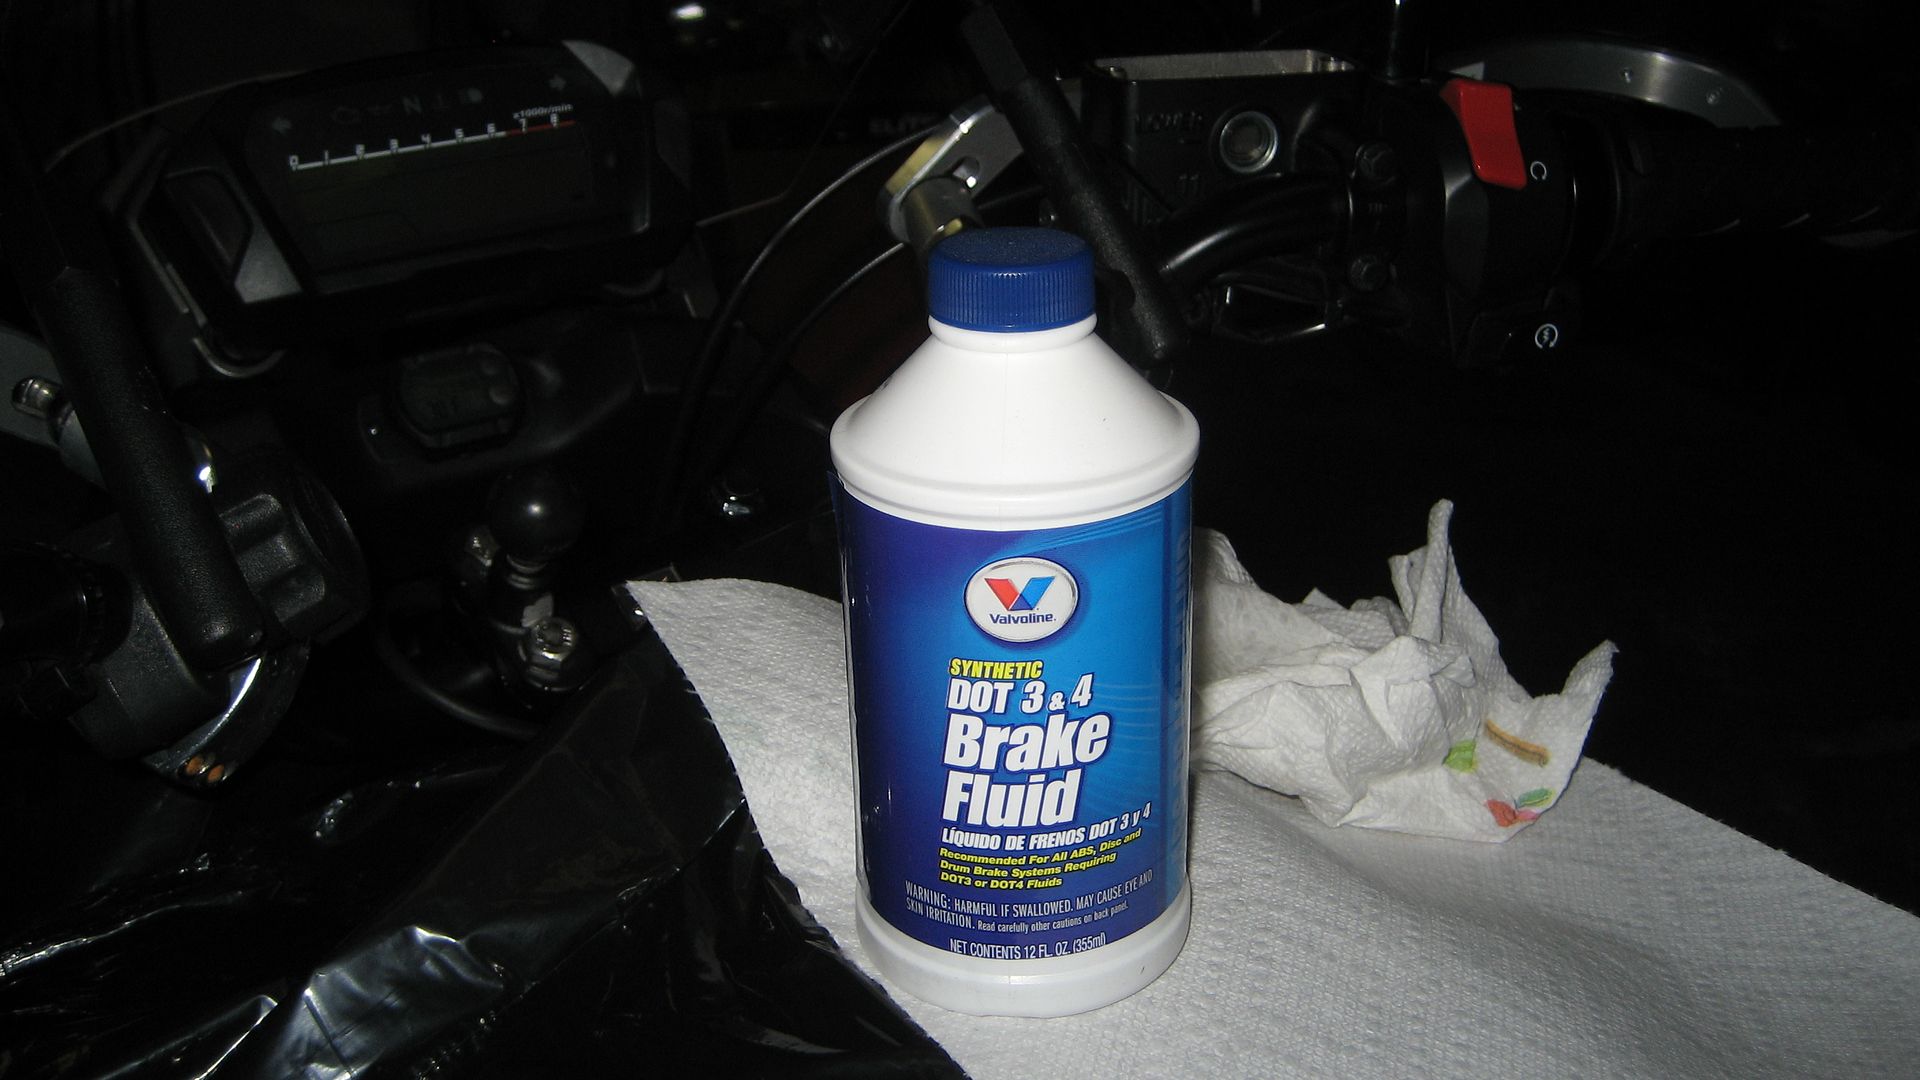
For this job you will need 1 twelve ounce bottle of DOT 3 & 4 brake fluid. I like this brand and specification.
The tools and items needed are an 8 mm socket, 1/4" drive rachet with an extension, and a JIS screwdriver, some plastic sheeting and paper towels, and a syringe.

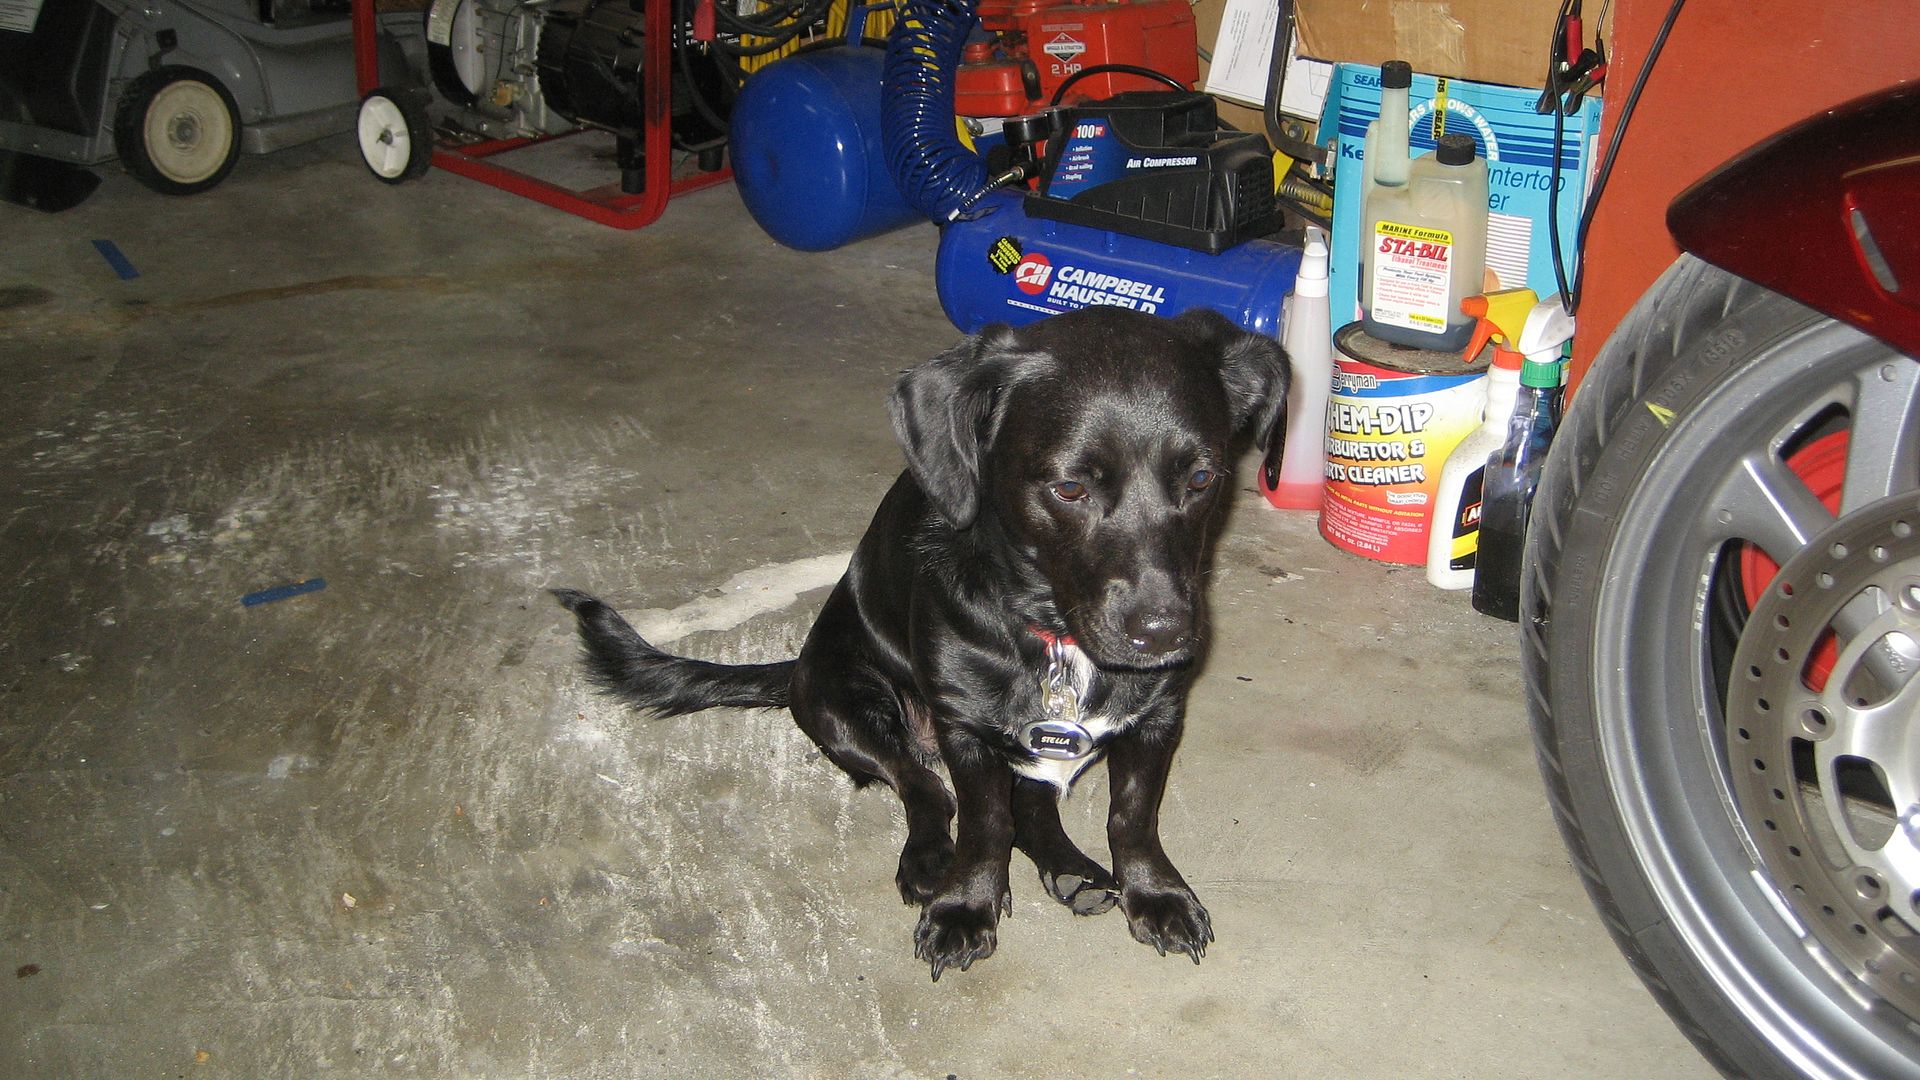
Brake fluid will damage some plastics and painted surfaces. Be very careful with spills or splashes and for an extra layer of protection use the plastic sheet ( I used a household trash can liner) to drape over the bike underneath and near the brake fluid reservoirs in case of an accidental spill. You will need a catch container for the old fluid and some 3/16th inch ID clear vinyl tubing. It doesn't hurt to have a spray bottle of water handy to dilute a spill on a painted surface either but if you careful it won't be needed. You may use a powered suction system or a vacuum pump but since the Non-Abs braking system is simple with short circuits I used the manual method of opening and closing the bleeder valve. The family pet is optional.
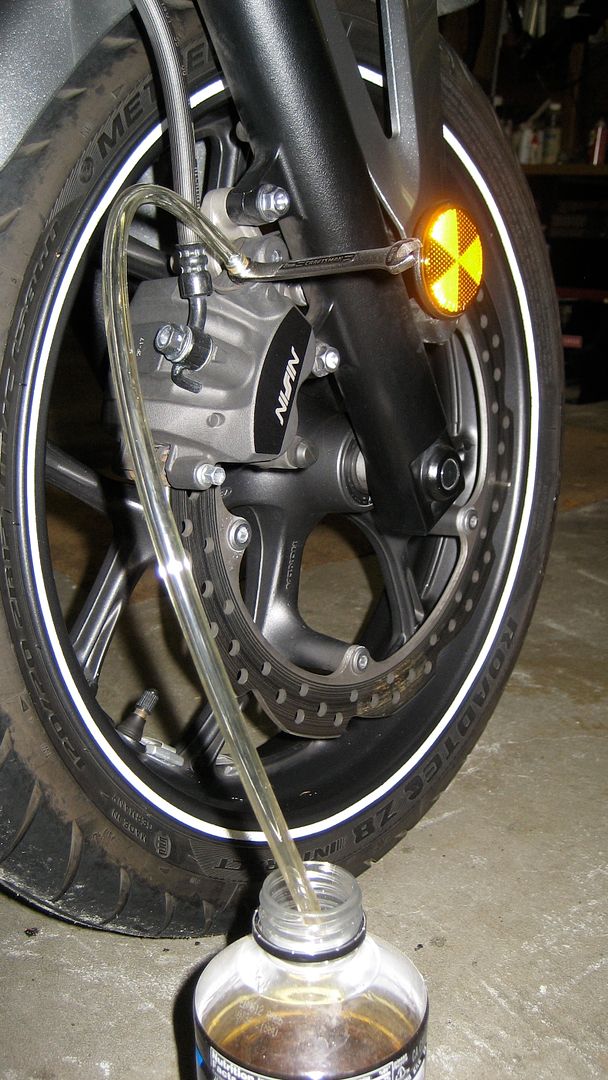
Position the handlebars so the front brake fluid reservoir is level. The bars are more or less straight ahead on the NC700. Remove the rubber dust cover from the front caliper bleeder valve and after placing the box end of the 8 mm wrench on the bleeder stretch the vinyl tubing over the front bleed valve. Later on the cover will be off the reservoir and we DO NOT WANT to move the handlebars or front wheel and spill the brake fluid out of the reservoir while wrestling the tubing onto the bleeder. Position the wrench so it moves freely through about 90 degrees or 1/4 turn. Cracking the bleeder open 1/4 turn allows brake fluid to flow out of the caliper under pressure from the lever or foot pedal. Closing the valve stops the flow so we need room to swing the wrench open and closed in one motion.
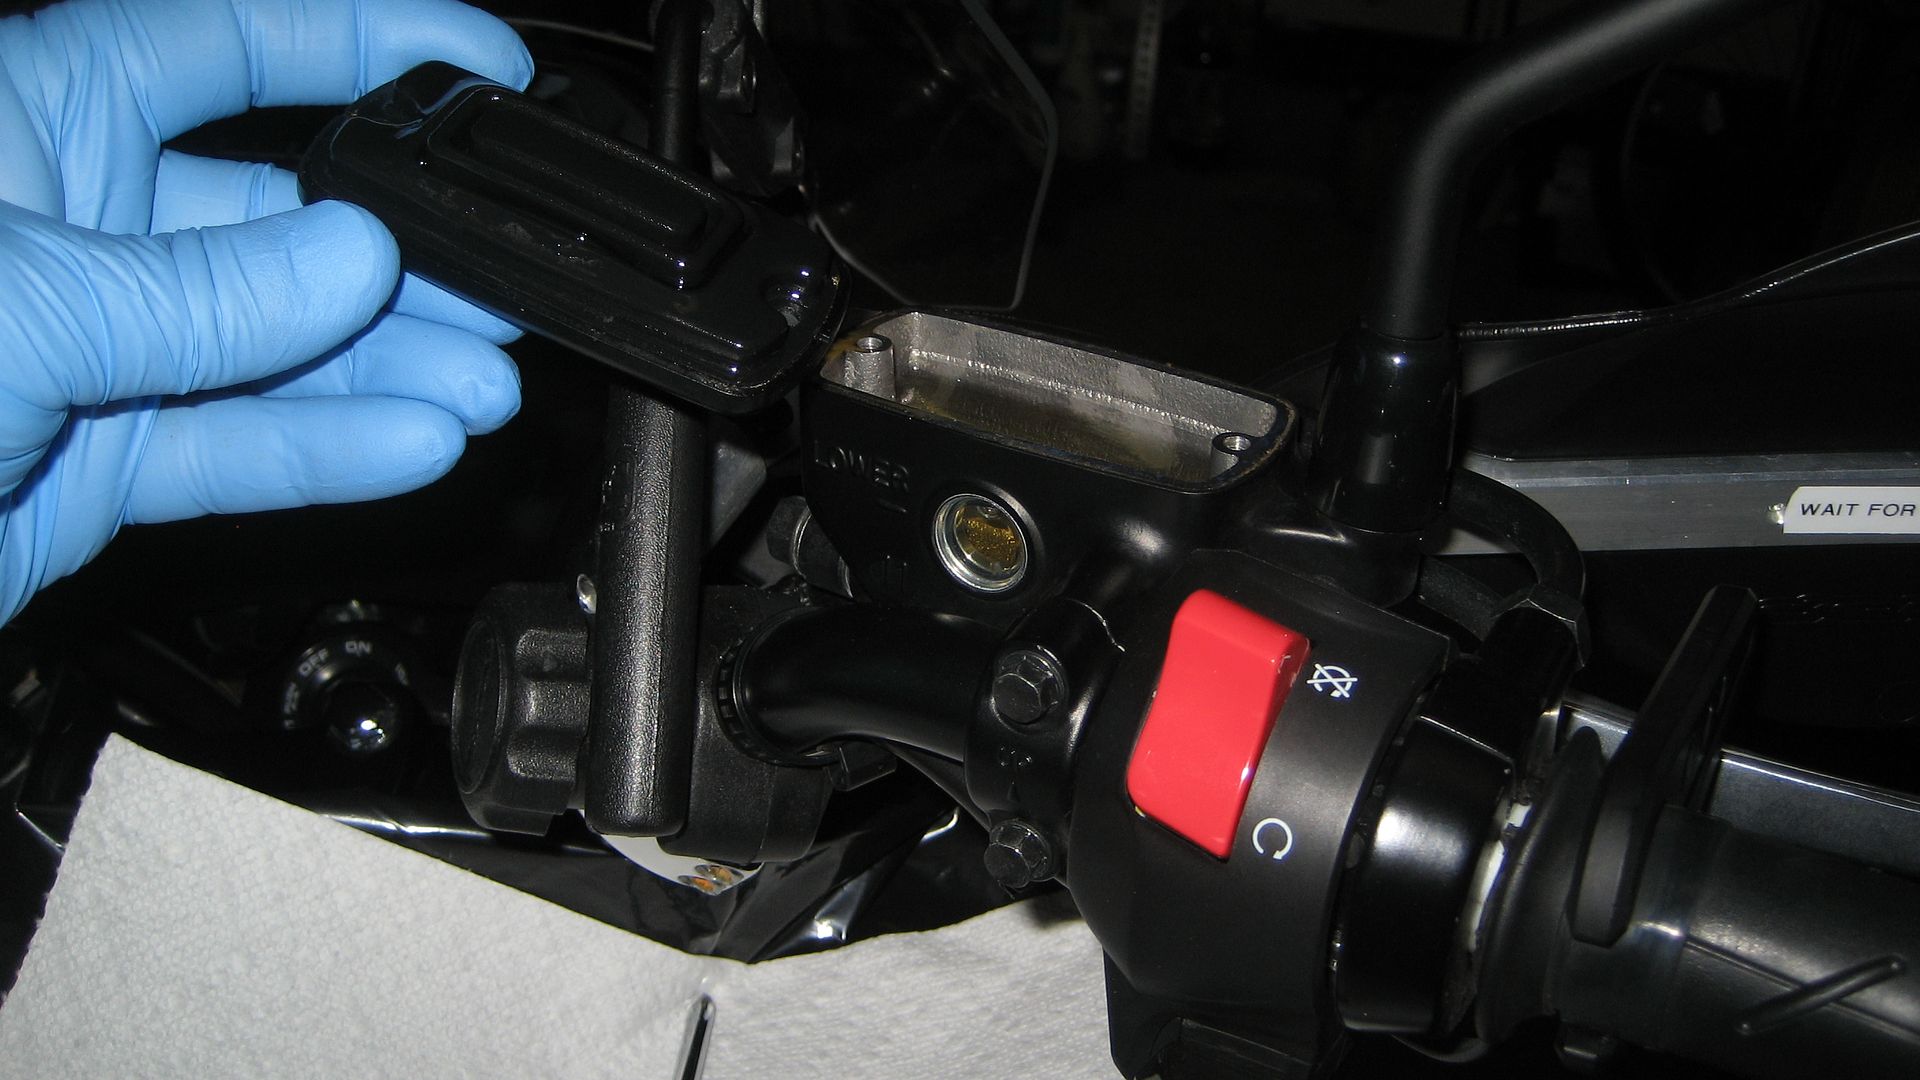
Remove the two screws securing the cover on the reservoir. Note how little torque is required to remove them, just 1.1 ft/lbs. They are very easy to strip upon reassembly. Remove the cover, the plastic set plate, and rubber diaphragm. Brake fluid is hygroscopic and attracts and retains moisture. There may be drops of water on the inside of the diaphragm. This is normal. Clean these parts throughly, dry them and set them aside. I pour isopropyl rubbing alcohol on the diaphragm to absorb and remove all moisture and wipe it dry with a clean towel.
Take the syringe and remove all the old fluid from the reservoir and squirt into the catch container. Be careful with drops falling off the tip. Really old fluid will be brown or deep amber in color. At 12,000 miles my fluid was yellowing but still clear. Observe the bottom of the reservoir and look for debris or clumps of goop lying on the bottom or in a corner. Again, at the first change mine was very clean as it should be. Take a swab or bit of towel to clean out any debris or crud that may be on the bottom. Fill the reservoir to the casting line with new fluid. Place the cap tightly on the container of new fluid to minimize the time it is exposed to open air. Act quickly now as we want to limit the time the fluid is exposed to air.
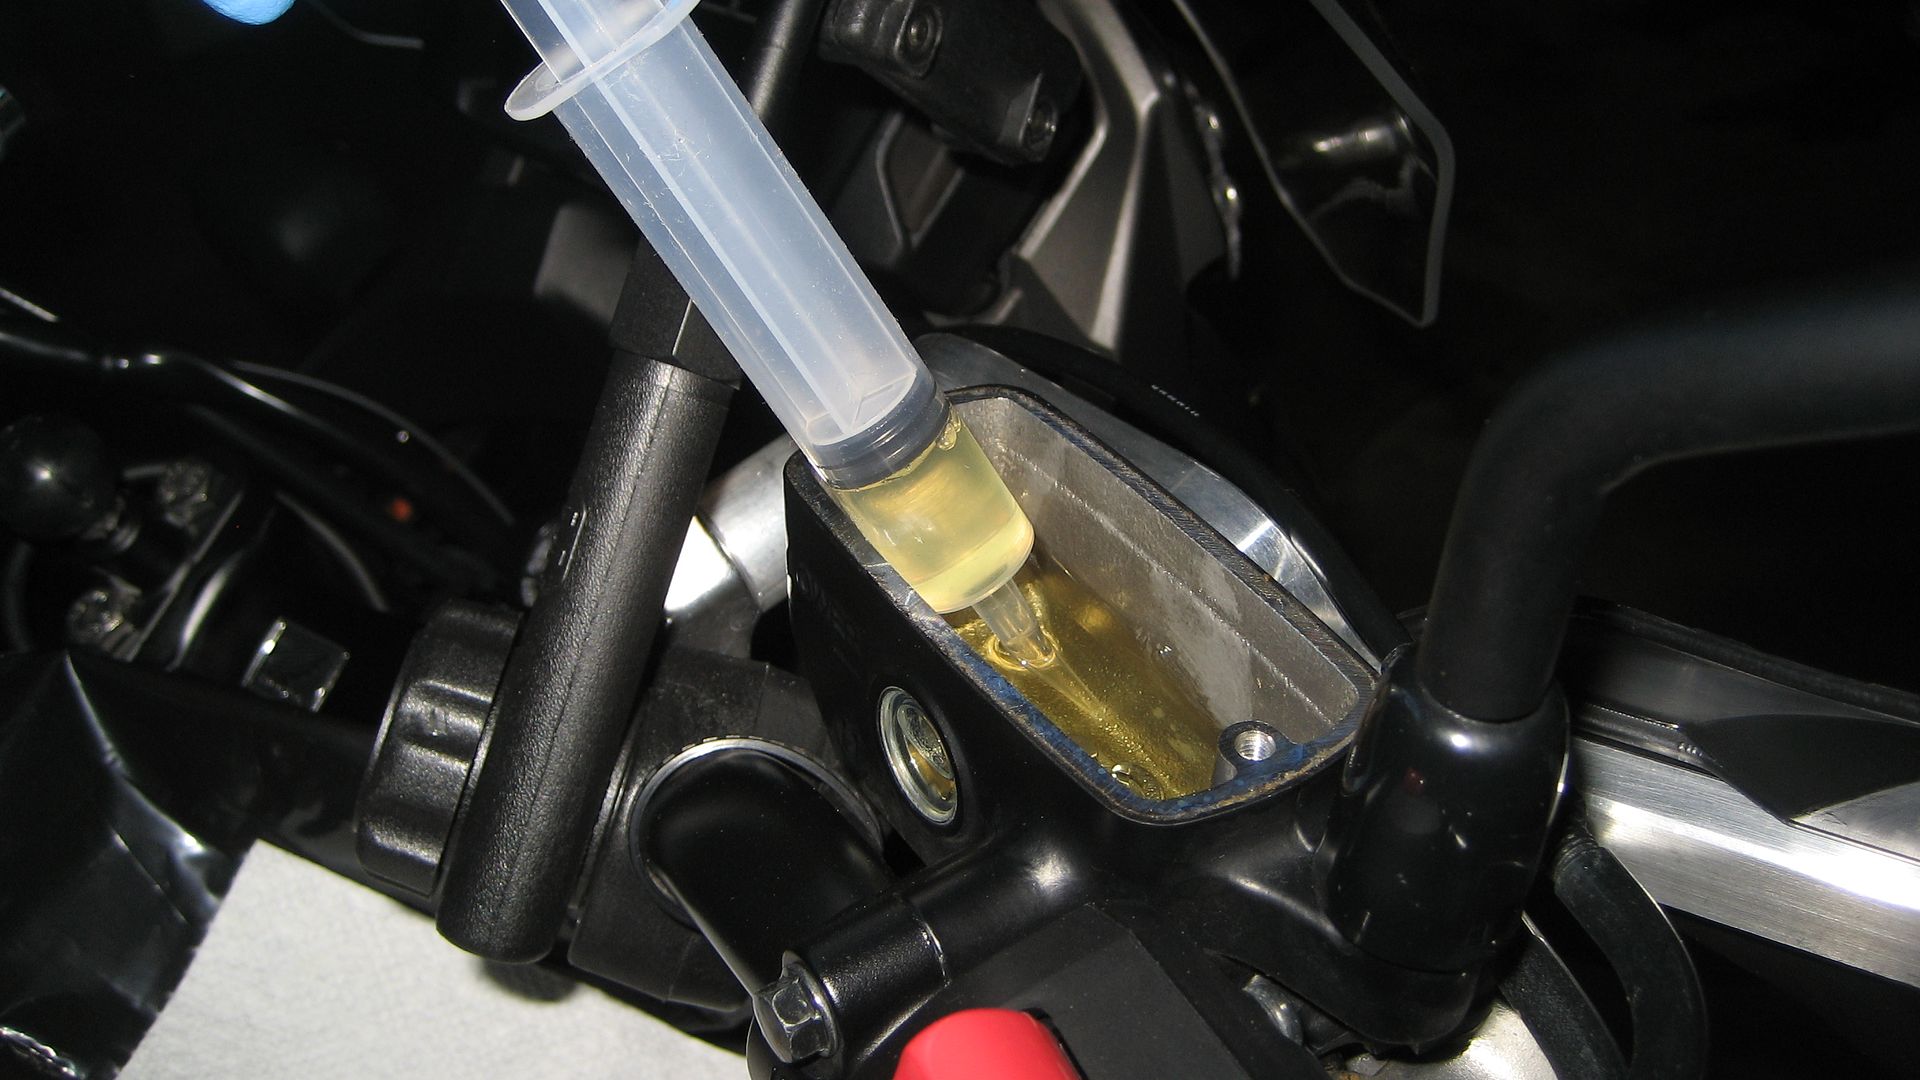
Kneeling down next to the bike, with one hand pull the brake lever in to pressurize the line. DO NOT MOVE THE HANDLEBAR AND SPILL FLUID. With the other hand crack the valve open 1/4 turn. The lever will collapse onto the throttle grip. While holding the lever against the throttle grip, close the valve. This action just pumped a small amount of fluid out of the caliper. If there was air in the caliper it will show up when leaving the caliper as bubbles in the clear tubing. Repeat, always holding brake lever closed until the bleeder is closed. Pull lever, open valve, close valve, release lever. Repeat about 10 times then check the level of fluid in the reservoir. If we pump all the new fluid out of the reservoir we introduce air in the system at the top and have to do all this over again to move the air down to the caliper and out the clear tubing. Don't pump the reservoir dry. The line is short and I pumped 1.5 reservoirs of new fluid through the system. If the fluid is old and discolored we will see the fresh new fluid appear in the clear tubing. The color will be different. Valvoline synthetic is almost clear when new. The new fluid displaces the old and 1.5 reservoirs are adequate to flush the old and replace with new. We can't have any bubbles of air coming out of the caliper - the fluid flow should be just fluid and no bubbles. As the brake pads wear the fluid level naturally drops. Top off the new fluid to the cast-in full line unless the pads are well worn down then you might lower the filled amount some to account for the pad wear. Take the diaphragm and assemble the white plastic set plate on top of it then the metal cover. Replace the assembly on the top of the reservoir and evenly tighten the screws to 1.1 ft/lbs. Wipe up any spilled fluid and carefully remove the tubing from the bleeder. A drop of fluid may fly off and land on a painted wheel so cover the end with a paper towel. Tighten the bleeder valve to 4 ft/lbs. The front is done.
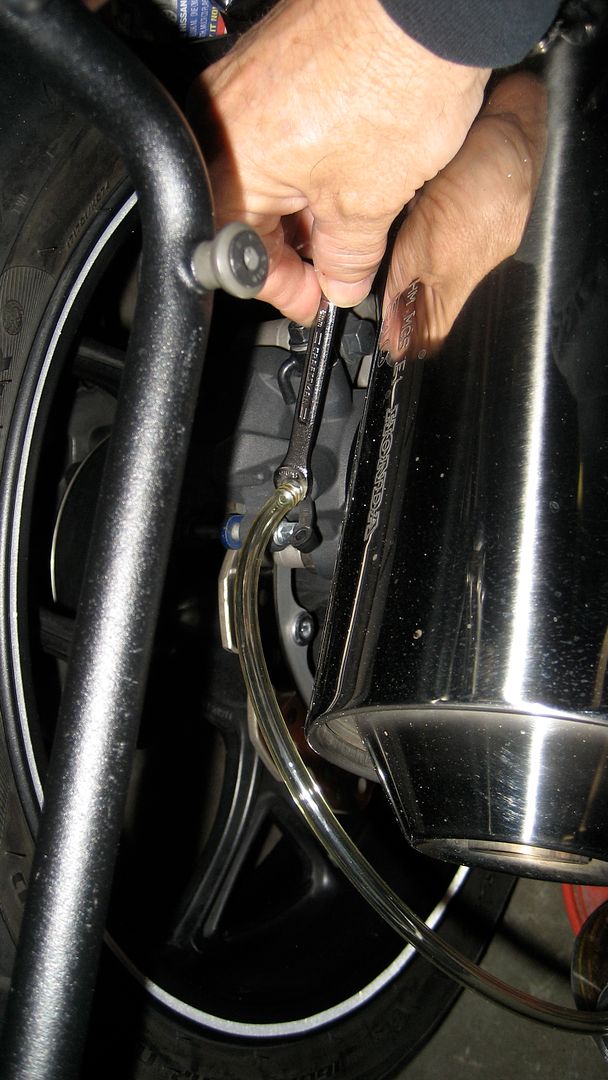
Take the plastic sheet and cover the right side pillion foot peg hanger and the swing arm under and near the rear reservoir. The rear reservoir requires the extra step of removing it in order to drain it and refill prior to pumping 1 to 1.5 reservoirs of new fluid through it. Before removing the reservoir fit the wrench and tubing onto the bleeder and set up the catch container. The exhaust pipe prevents an easy 1/4 turn swing of the wrench so mind you have enough room to open and close the valve. You will but I had to use the open end of the 8 mm wrench.
The 8 mm socket and extension fits the 8 mm bolt that mounts the reservoir to the bike. Hold the reservoir to keep it from rotating counter-clockwise when cracking this bolt loose. Mine was very tight. The mounting bracket may bend initially before the bolt comes free and you don't know it until later. The nut for the mounting bolt remains attached on the back side of the bracket.

Carefully pull the reservoir back then outside of the frame minding not to pull too much on the rubber pipe that connects it to the master cylinder. Wipe off any dust or dirt on the top of it and remove the cover screws, the cover, set piece and diaphragm. Clean and dry these parts as before and set aside. Suction out the fluid as before and clean out any debris and goo if you find any. Mine was clean.
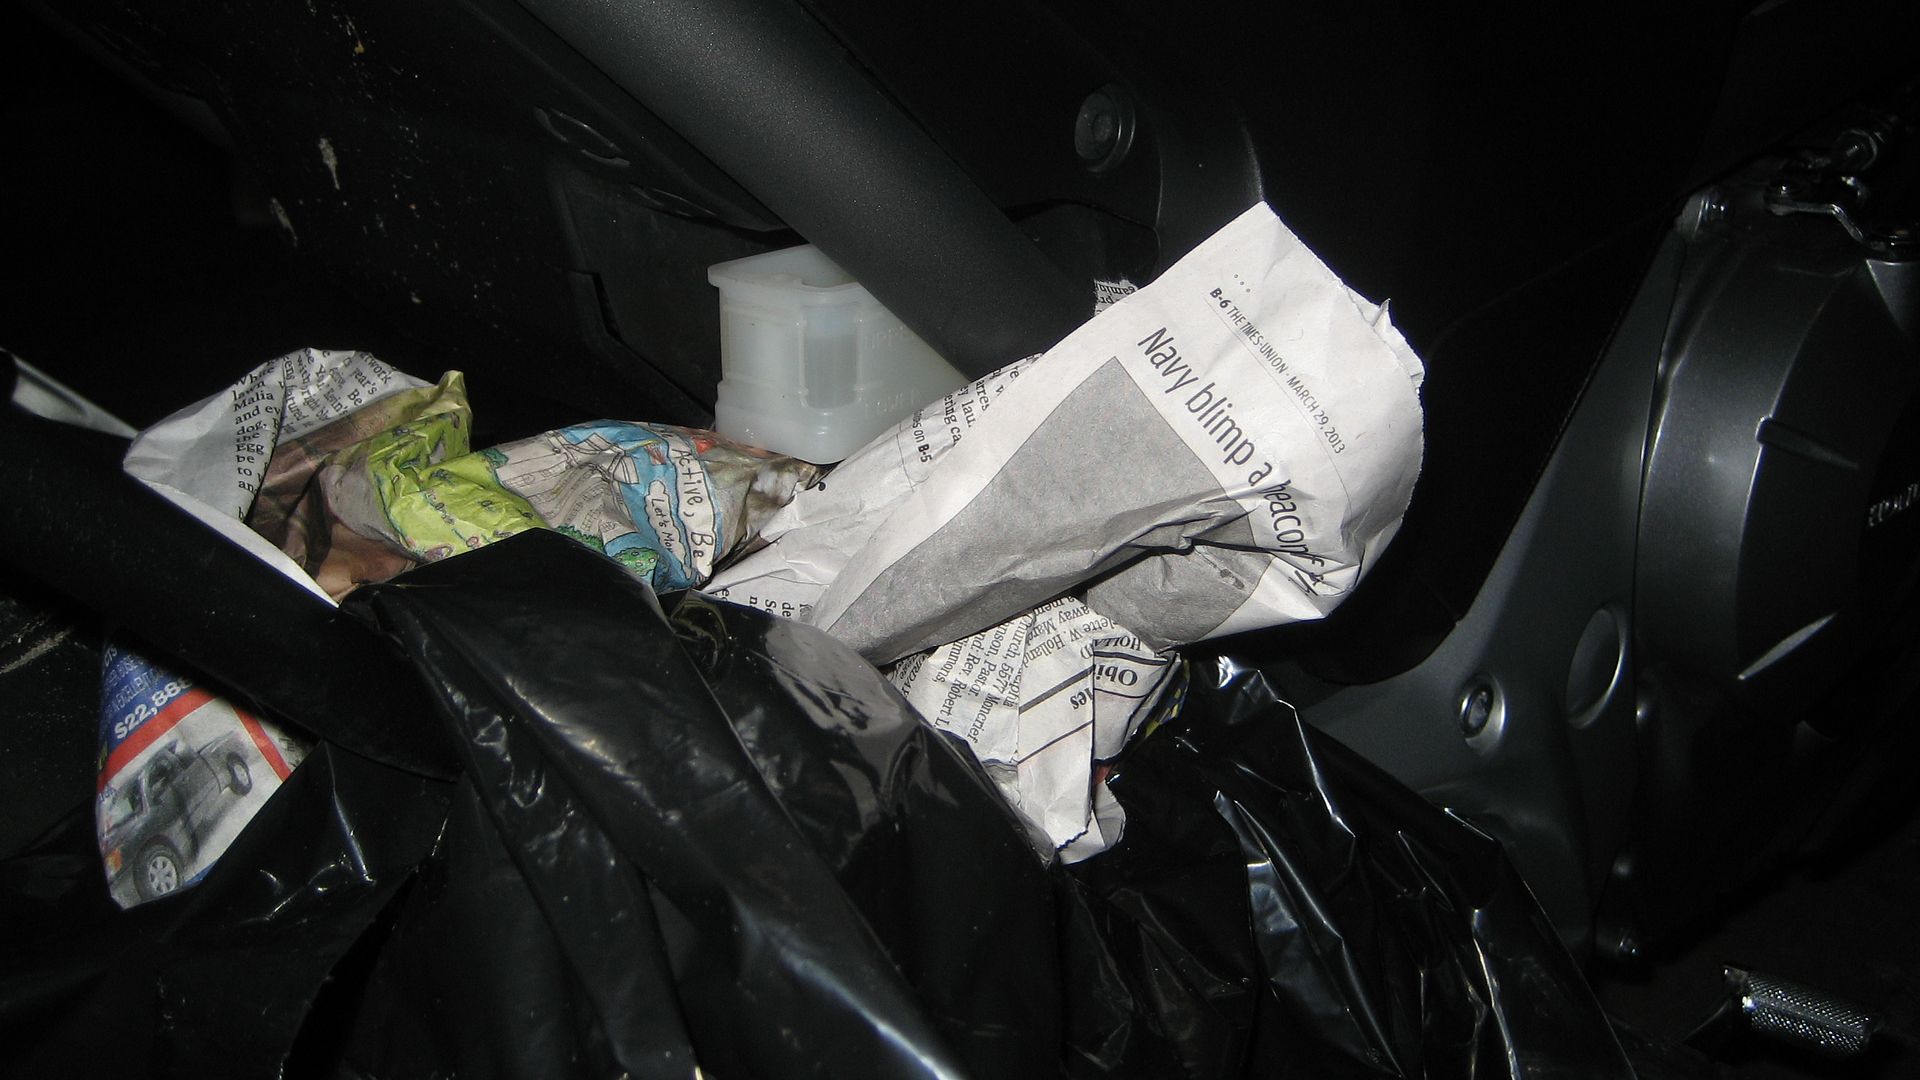
Fill the reservoir to the full line with new fluid and carefully replace more or less into the mounted position. I took a piece of wadded-up newspaper to hold the reservoir approximately in the mounted position. The service manual says to mount the reservoir in a provided lower bolt hole with the 8 mm bolt and a spare nut but I just used the newspaper wad to hold it in a level position. Using the brake's foot pedal, pump pressure in the system then crack open the bleeder as before. Press and hold the pedal down then close the bleeder, repeat as necessary to pump a full reservoir of new fluid through the rear system. Again, DO NOT PUMP THE RESERVOIR DRY. Carefully pull the reservoir back outside the frame and fill with new fluid and replace the diaphragm, set plate, cover and two screws. Tighten cover screws carefully to 1.1 ft/lbs.
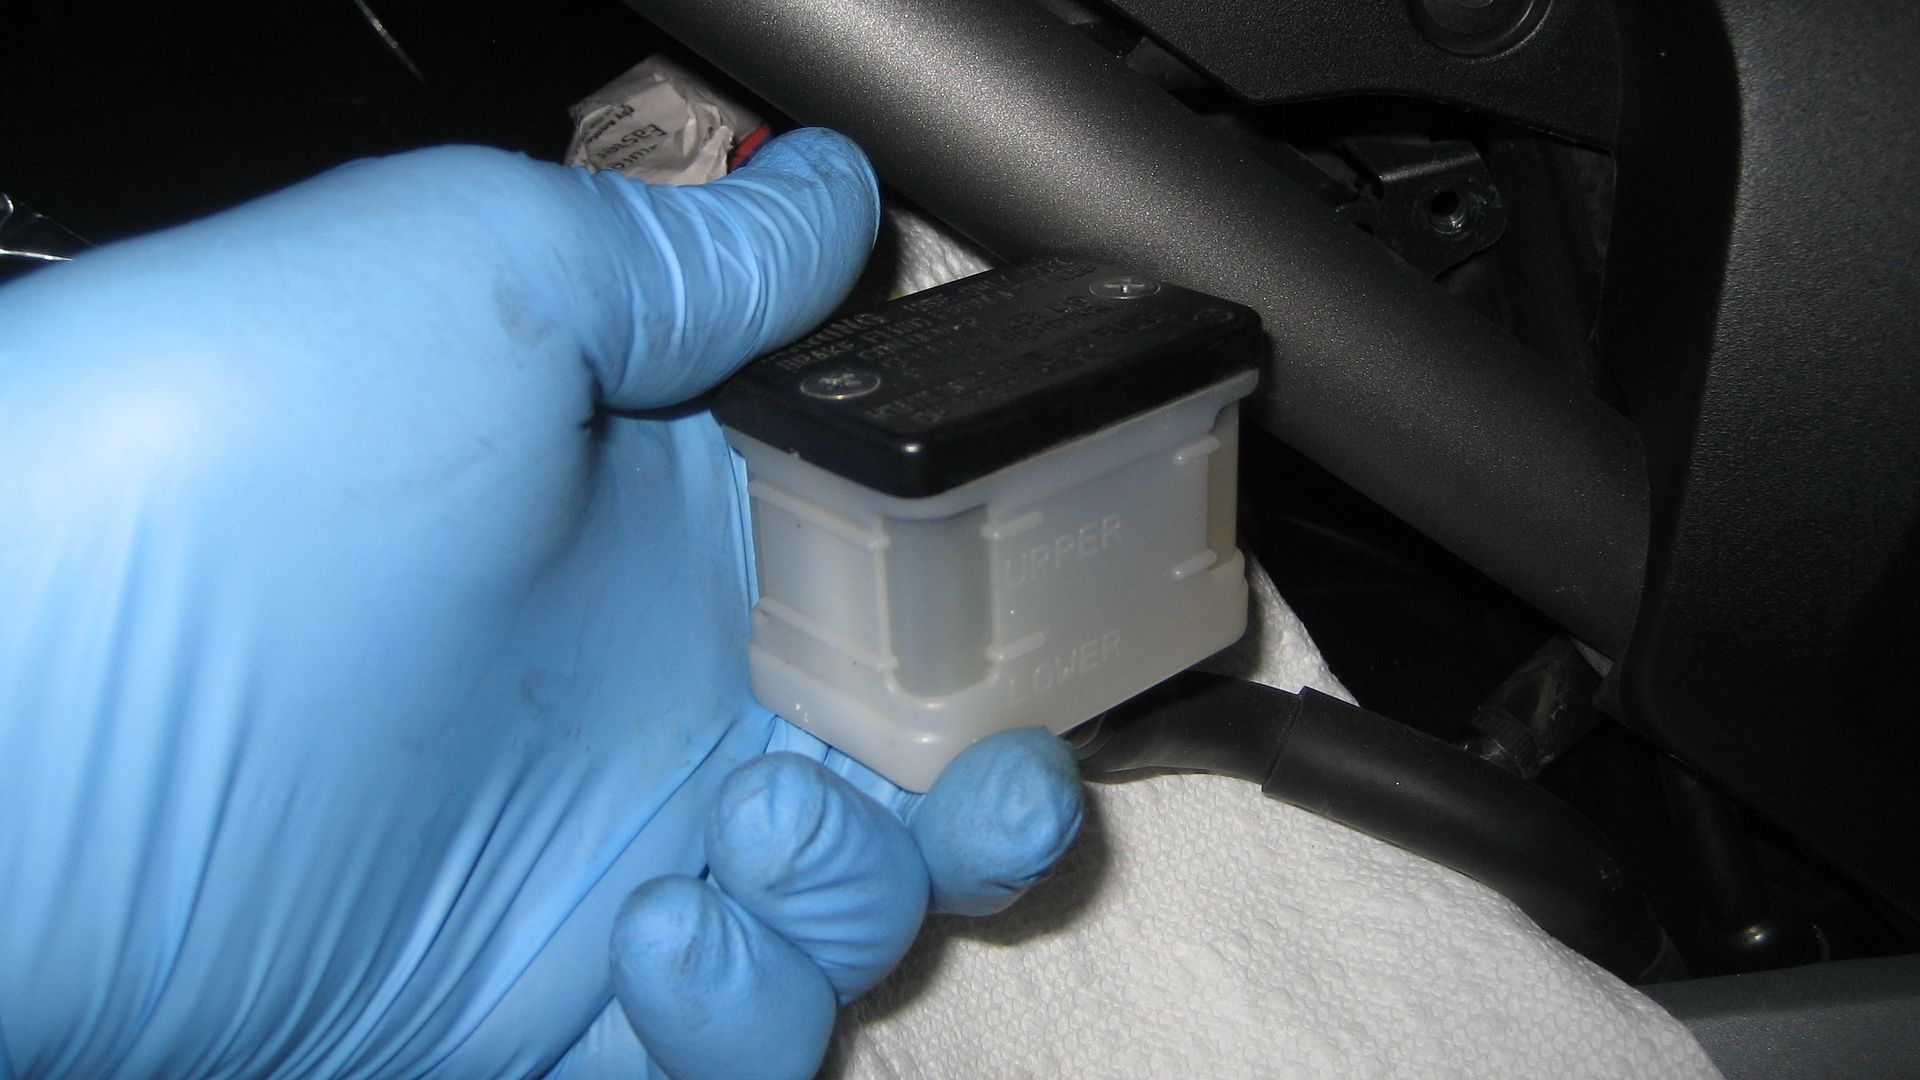
To replace the reservoir in the bracket correctly there is a peg on the reservoir that fits into a hole in the bracket before fitting the mounting bolt and tightening to 7 ft/lbs. In the pic my thumb is kind of pointing to it. When I removed mine the metal mounting bracket bent with the torque of the ratchet so when I replaced it with the peg in the orienting hole and tightened the reservoir mounting bolt the reservoir was tilted down about 20 degrees. I puzzled over this a moment before realizing the bracket itself was bent down. I carefully bent the bracket back into place by pushing up on the the bottom of the reservoir so it was level again.

Pull and press the brakes to make sure the lever and pedal are firm on the first pull or press of the associated brake. That's it. I used about half of the 12 oz. bottle of fluid.
For this job you will need 1 twelve ounce bottle of DOT 3 & 4 brake fluid. I like this brand and specification.
The tools and items needed are an 8 mm socket, 1/4" drive rachet with an extension, and a JIS screwdriver, some plastic sheeting and paper towels, and a syringe.
Brake fluid will damage some plastics and painted surfaces. Be very careful with spills or splashes and for an extra layer of protection use the plastic sheet ( I used a household trash can liner) to drape over the bike underneath and near the brake fluid reservoirs in case of an accidental spill. You will need a catch container for the old fluid and some 3/16th inch ID clear vinyl tubing. It doesn't hurt to have a spray bottle of water handy to dilute a spill on a painted surface either but if you careful it won't be needed. You may use a powered suction system or a vacuum pump but since the Non-Abs braking system is simple with short circuits I used the manual method of opening and closing the bleeder valve. The family pet is optional.
Position the handlebars so the front brake fluid reservoir is level. The bars are more or less straight ahead on the NC700. Remove the rubber dust cover from the front caliper bleeder valve and after placing the box end of the 8 mm wrench on the bleeder stretch the vinyl tubing over the front bleed valve. Later on the cover will be off the reservoir and we DO NOT WANT to move the handlebars or front wheel and spill the brake fluid out of the reservoir while wrestling the tubing onto the bleeder. Position the wrench so it moves freely through about 90 degrees or 1/4 turn. Cracking the bleeder open 1/4 turn allows brake fluid to flow out of the caliper under pressure from the lever or foot pedal. Closing the valve stops the flow so we need room to swing the wrench open and closed in one motion.
Remove the two screws securing the cover on the reservoir. Note how little torque is required to remove them, just 1.1 ft/lbs. They are very easy to strip upon reassembly. Remove the cover, the plastic set plate, and rubber diaphragm. Brake fluid is hygroscopic and attracts and retains moisture. There may be drops of water on the inside of the diaphragm. This is normal. Clean these parts throughly, dry them and set them aside. I pour isopropyl rubbing alcohol on the diaphragm to absorb and remove all moisture and wipe it dry with a clean towel.
Take the syringe and remove all the old fluid from the reservoir and squirt into the catch container. Be careful with drops falling off the tip. Really old fluid will be brown or deep amber in color. At 12,000 miles my fluid was yellowing but still clear. Observe the bottom of the reservoir and look for debris or clumps of goop lying on the bottom or in a corner. Again, at the first change mine was very clean as it should be. Take a swab or bit of towel to clean out any debris or crud that may be on the bottom. Fill the reservoir to the casting line with new fluid. Place the cap tightly on the container of new fluid to minimize the time it is exposed to open air. Act quickly now as we want to limit the time the fluid is exposed to air.
Kneeling down next to the bike, with one hand pull the brake lever in to pressurize the line. DO NOT MOVE THE HANDLEBAR AND SPILL FLUID. With the other hand crack the valve open 1/4 turn. The lever will collapse onto the throttle grip. While holding the lever against the throttle grip, close the valve. This action just pumped a small amount of fluid out of the caliper. If there was air in the caliper it will show up when leaving the caliper as bubbles in the clear tubing. Repeat, always holding brake lever closed until the bleeder is closed. Pull lever, open valve, close valve, release lever. Repeat about 10 times then check the level of fluid in the reservoir. If we pump all the new fluid out of the reservoir we introduce air in the system at the top and have to do all this over again to move the air down to the caliper and out the clear tubing. Don't pump the reservoir dry. The line is short and I pumped 1.5 reservoirs of new fluid through the system. If the fluid is old and discolored we will see the fresh new fluid appear in the clear tubing. The color will be different. Valvoline synthetic is almost clear when new. The new fluid displaces the old and 1.5 reservoirs are adequate to flush the old and replace with new. We can't have any bubbles of air coming out of the caliper - the fluid flow should be just fluid and no bubbles. As the brake pads wear the fluid level naturally drops. Top off the new fluid to the cast-in full line unless the pads are well worn down then you might lower the filled amount some to account for the pad wear. Take the diaphragm and assemble the white plastic set plate on top of it then the metal cover. Replace the assembly on the top of the reservoir and evenly tighten the screws to 1.1 ft/lbs. Wipe up any spilled fluid and carefully remove the tubing from the bleeder. A drop of fluid may fly off and land on a painted wheel so cover the end with a paper towel. Tighten the bleeder valve to 4 ft/lbs. The front is done.
Take the plastic sheet and cover the right side pillion foot peg hanger and the swing arm under and near the rear reservoir. The rear reservoir requires the extra step of removing it in order to drain it and refill prior to pumping 1 to 1.5 reservoirs of new fluid through it. Before removing the reservoir fit the wrench and tubing onto the bleeder and set up the catch container. The exhaust pipe prevents an easy 1/4 turn swing of the wrench so mind you have enough room to open and close the valve. You will but I had to use the open end of the 8 mm wrench.
The 8 mm socket and extension fits the 8 mm bolt that mounts the reservoir to the bike. Hold the reservoir to keep it from rotating counter-clockwise when cracking this bolt loose. Mine was very tight. The mounting bracket may bend initially before the bolt comes free and you don't know it until later. The nut for the mounting bolt remains attached on the back side of the bracket.
Carefully pull the reservoir back then outside of the frame minding not to pull too much on the rubber pipe that connects it to the master cylinder. Wipe off any dust or dirt on the top of it and remove the cover screws, the cover, set piece and diaphragm. Clean and dry these parts as before and set aside. Suction out the fluid as before and clean out any debris and goo if you find any. Mine was clean.
Fill the reservoir to the full line with new fluid and carefully replace more or less into the mounted position. I took a piece of wadded-up newspaper to hold the reservoir approximately in the mounted position. The service manual says to mount the reservoir in a provided lower bolt hole with the 8 mm bolt and a spare nut but I just used the newspaper wad to hold it in a level position. Using the brake's foot pedal, pump pressure in the system then crack open the bleeder as before. Press and hold the pedal down then close the bleeder, repeat as necessary to pump a full reservoir of new fluid through the rear system. Again, DO NOT PUMP THE RESERVOIR DRY. Carefully pull the reservoir back outside the frame and fill with new fluid and replace the diaphragm, set plate, cover and two screws. Tighten cover screws carefully to 1.1 ft/lbs.
To replace the reservoir in the bracket correctly there is a peg on the reservoir that fits into a hole in the bracket before fitting the mounting bolt and tightening to 7 ft/lbs. In the pic my thumb is kind of pointing to it. When I removed mine the metal mounting bracket bent with the torque of the ratchet so when I replaced it with the peg in the orienting hole and tightened the reservoir mounting bolt the reservoir was tilted down about 20 degrees. I puzzled over this a moment before realizing the bracket itself was bent down. I carefully bent the bracket back into place by pushing up on the the bottom of the reservoir so it was level again.
Pull and press the brakes to make sure the lever and pedal are firm on the first pull or press of the associated brake. That's it. I used about half of the 12 oz. bottle of fluid.

