

dduelin
Site Supporter
Tonight I changed the fluid in the forks and cleaned out the dirty goop that collects in the bottom of the fork legs. Honda does not give a service interval for this that I know of but I tend to keep a bike a long time and regular fluid changes here prolong the wear items of bushings and seals. I do it about every 15 to 20,000 miles with my bikes. There is no drain bolt at the bottom of the fork legs so to drain and replace the fork oil the forks have to come out and drain when turned upside down.
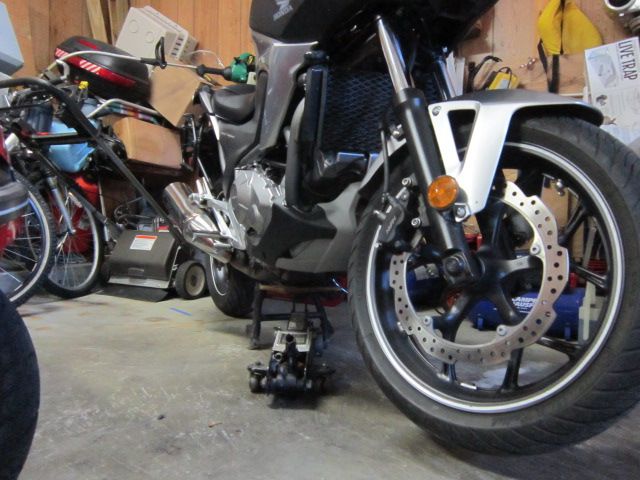
First I supported the front of the bike with a floor jack under the engine crankcase. A piece of wood protects the aluminum sump from the steel jack and spreads the load over a wider area. I lift the front until the rear tire is touching the floor.
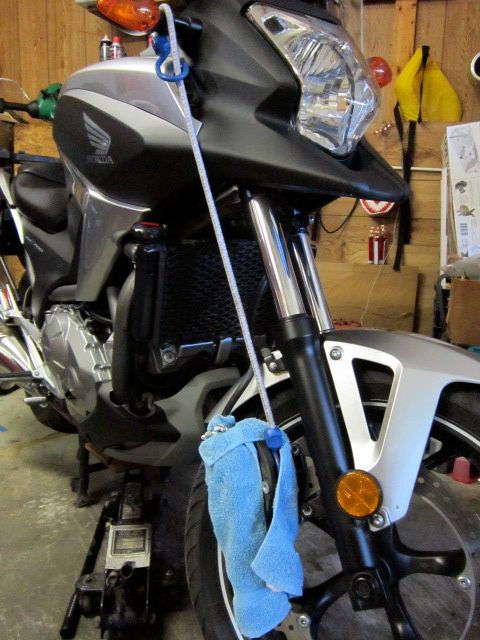
Next I removed the front brake caliper by removing the two bolts affixing it to the fork leg. I wrapped the caliper in a clean rag to keep it from scratching it and the paint of the wheel, fender, and fork leg. It hangs from a long bungee cord to keep from stressing the rubber brake hose.
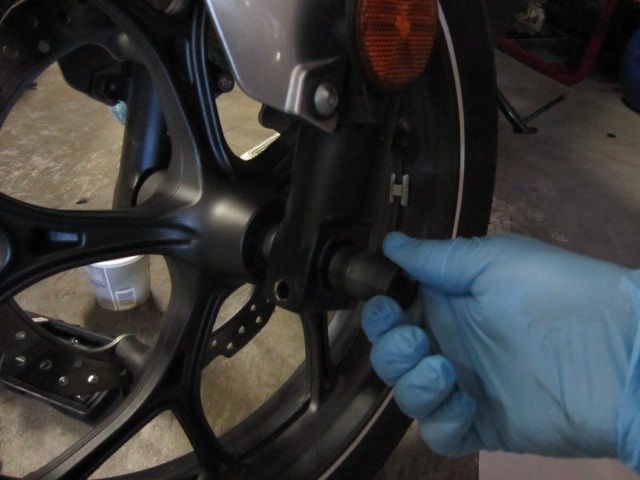
Now I dropped the front wheel out of the fork. Remove the pinch bolt and back out the axle with a 17 mm hex then pull the axle out. Wrap it in a clean rag or paper towel and don't drop the spacers out of the wheel hub and loose them. With the rear tire touching the floor there is enough clearance to roll the tire out from under the fender. The brake disc can be damaged if the wheel falls over on that side. I store it against the wall of the garage.
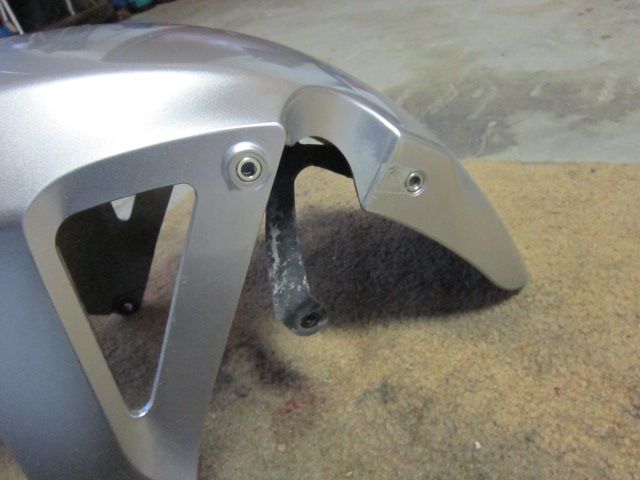
Next the fender comes off. I didn't get a picture of it but when I removed the bracket that retains the rubber brake hose I could see how easily the bracket could scratch the fender when it's bolt is removed. After removing the 8 mm bolt that retains the bracket I wrapped the hose and bracket in a clean piece of cloth rag. Take out the 5 mm hex head bolts and remove the fender - lift it up at first then turn it 90 degrees to clear the fork legs and not scratch the paint on the fender.
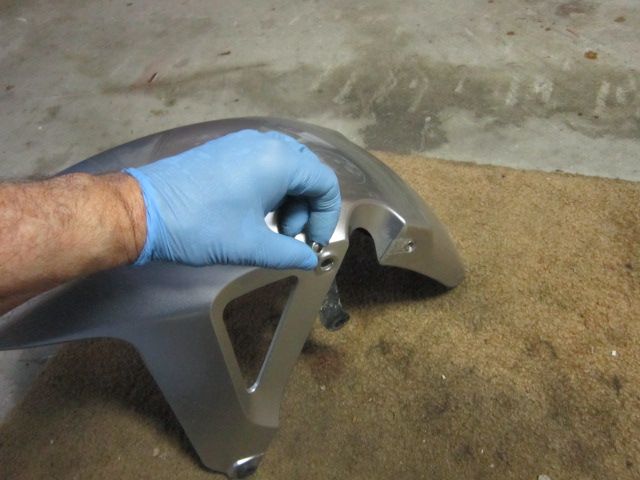
When I turned the fender 90 degrees this little metal spacer fell out and sought the safety of darkness under the air compressor several feet away. I happened to see it as it fell out then lost sight of it. I had a hard time finding it so be careful of this part falling out of the hole or holes in the fender.
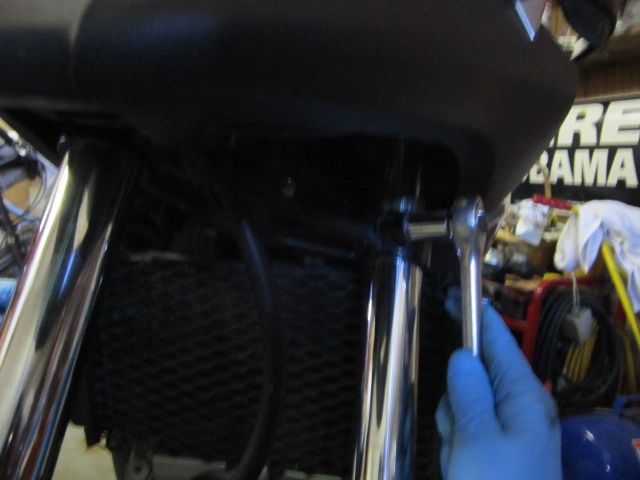
The fork tubes will come out next. The fork cap is going to come off to change the oil so loosen the top clamp bolts while the lower clamp bolts keep the fork tube from turning. These are 6 mm allen head bolts and the clearance is tight. I could not use a rachet handle but a breaker bar just fit inside the fairing. I could have removed the fairing to gain more access but I did not.
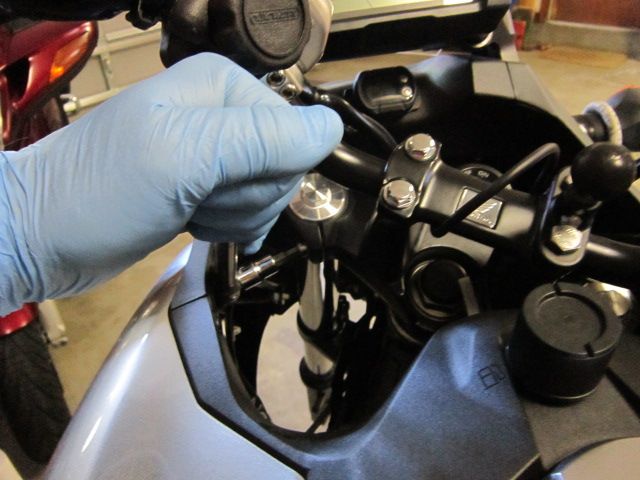
Now I loosened the fork caps on top of the fork tube while the lower clamp bolts were still in place. Same deal, I want the lower clamp bolts to keep the fork tubes from turning while breaking the fork cap loose with a 17 mm wrench. Be careful of scratching the top of the cap and/or the top bridge of the fork. Just loosen the cap a couple of turns. Don't remove it yet - the spring inside is under pressure.
With the fork leg supported loosen the 14 mm lower clamp bolt. The fork leg will drop out and fall on the floor if you aren't ready for it.
With the tube in one hand and the 17 mm wrench in the other unscrew the fork cap. Turn the last few turns by hand prepared to catch the cap when it springs free. With the stock spring it won't fly off across the room but it can surprise you and fall onto the floor and dent or flatten one edge or muck up the threads on the underside of it.
Pull out the metal spacer on top of the spring.
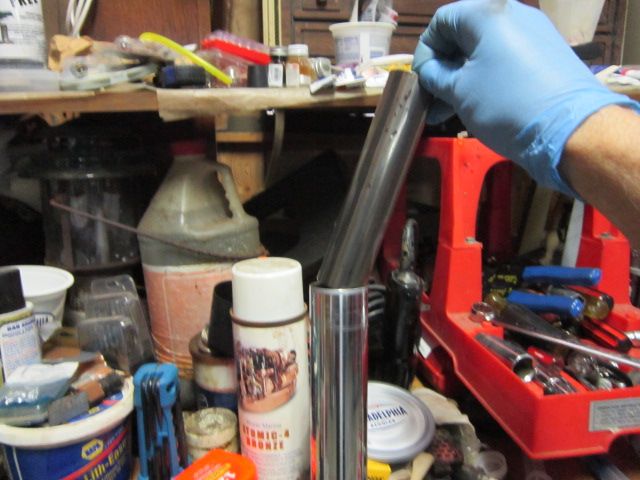
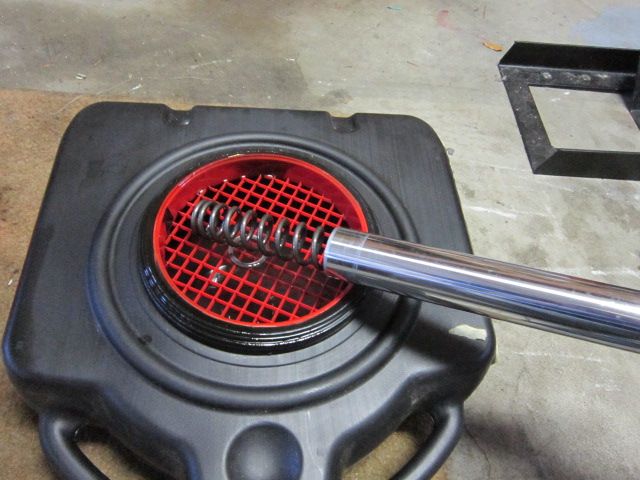
I tipped the fork tube over so the oil runs out into a catch basin. The spring washer and spring will slide out. Wipe off the spring, washer, and spacer and put in a clean place. Turn the tube upside down and drain out most of the oil by pumping the tube into the leg a few times.
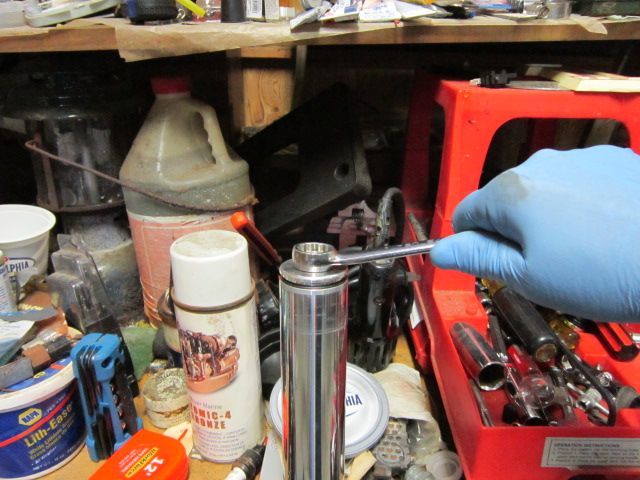
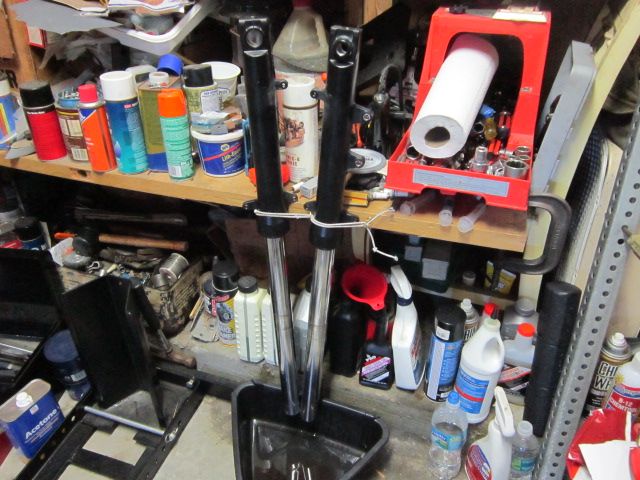
I made a little jig on the edge of the bench to hold fork tubes upside down over a basin. I leave them here for 15 or 20 minutes to drain. The oil is pretty dirty after just 17,250 miles.
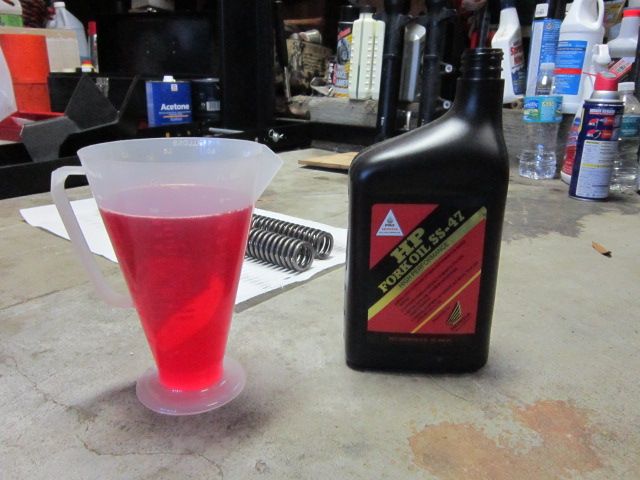
While the tubes are draining measure the free length of the springs. There is a spec length of at least 387 mm for stock springs. Mine were 397 mm. Record this over time if you are interested to see if the springs sag. The springs in my ST1300 are original length at 120,000 miles.
After the tubes quit draining I spray a liberal quantity of brake cleaner into the tube and pump the tube into the leg to clean out the goop in the bottom of the legs and fork orifices. Turn the leg and tube upside and pump it dry. Fluid will remain in the fork bottom unless you pump it out. The diluted oil & cleaner that comes out should be clean. I let the forks drain upside down again for a few minutes then place them upright in the jig to completely dry.
I measured about 520 cc of SS-47 Honda fork oil in my beaker. Collapse the tube into the leg and pour in this amount into each fork leg for a total of about 1,040 cc for the entire job. The correct amount of oil will come up to a point 104 mm from the top of the fork tube. This is supposed to be 514 cc per leg but I pour in a little excess. If you prefer another brand of oil be advised that "weight" is not a good method to describe the qualities of light oils like this. A 5 wt oil in one brand can be thicker than the 10 wt oil in another brand but use what oil you like. I prefer to stay with the stock oil at least for a change or two. SS-47 is described as a 10wt oil by Honda so you could use Honda SS-8 which is another Honda 10wt oil.
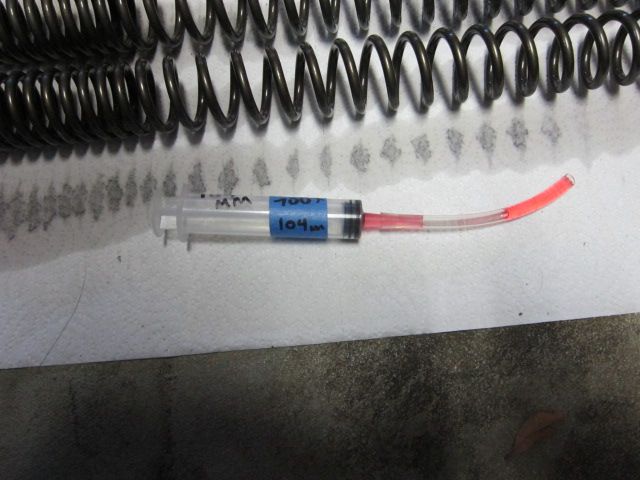
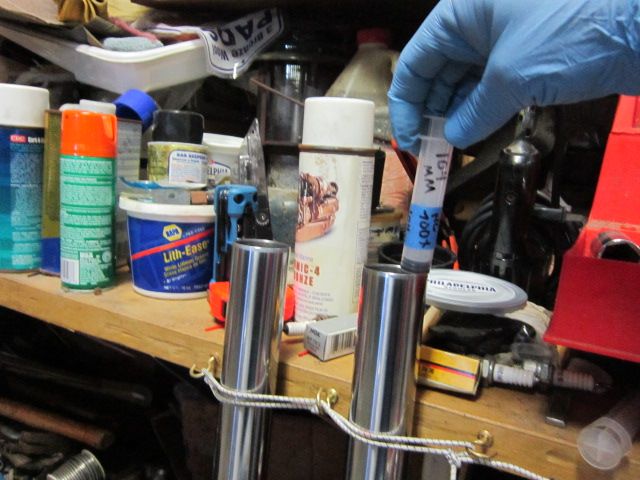
I made a fork oil gauge with a syringe and a piece of vinyl tubing. The distance from the bottom of the syringe barrel to the tip of the tubing is 104 mm. I place the barrel against the top edge of the fork tube and suck out excess oil until it pulls air leaving a stock oil level of 104 mm.
Insert the spring with the tightly wound coils downward then the washer then the spacer. With the fork cap in place and held down with the palm of my right hand I turn the fork tube with my left hand to start the threads. Finish tightening the cap with the 17 mm wrench until you can turn no further. Insert the reassembled fork tube into the lower fork clamp until the top edge of the tube is flush with the top bridge and tighten the lower clamp bolt to hold in in place. Torque the lower clamp bolt to 29 ft. lbs. then tighten the fork cap to 16 ft. lbs. Only after the lower bolt and the fork cap are tightened did I torque the upper clamp allen bolt to 16 ft lbs. Repeat with the other leg. Reassemble the brake caliper to the fork leg. The caliper slips over the brake disc easy if you spread the pads apart before slipping it into place. Torque the caliper mounting bolts to 22 lbs. Honda says to replace them every time but I reuse them once or twice. Replace the fender and wheel to complete the job. The axle torque is 55 ft lbs, the axle pinch bolt 16 ft. lbs. Apply front brake until the pads contact the disc before riding the bike.
First I supported the front of the bike with a floor jack under the engine crankcase. A piece of wood protects the aluminum sump from the steel jack and spreads the load over a wider area. I lift the front until the rear tire is touching the floor.

Next I removed the front brake caliper by removing the two bolts affixing it to the fork leg. I wrapped the caliper in a clean rag to keep it from scratching it and the paint of the wheel, fender, and fork leg. It hangs from a long bungee cord to keep from stressing the rubber brake hose.

Now I dropped the front wheel out of the fork. Remove the pinch bolt and back out the axle with a 17 mm hex then pull the axle out. Wrap it in a clean rag or paper towel and don't drop the spacers out of the wheel hub and loose them. With the rear tire touching the floor there is enough clearance to roll the tire out from under the fender. The brake disc can be damaged if the wheel falls over on that side. I store it against the wall of the garage.

Next the fender comes off. I didn't get a picture of it but when I removed the bracket that retains the rubber brake hose I could see how easily the bracket could scratch the fender when it's bolt is removed. After removing the 8 mm bolt that retains the bracket I wrapped the hose and bracket in a clean piece of cloth rag. Take out the 5 mm hex head bolts and remove the fender - lift it up at first then turn it 90 degrees to clear the fork legs and not scratch the paint on the fender.
When I turned the fender 90 degrees this little metal spacer fell out and sought the safety of darkness under the air compressor several feet away. I happened to see it as it fell out then lost sight of it. I had a hard time finding it so be careful of this part falling out of the hole or holes in the fender.


The fork tubes will come out next. The fork cap is going to come off to change the oil so loosen the top clamp bolts while the lower clamp bolts keep the fork tube from turning. These are 6 mm allen head bolts and the clearance is tight. I could not use a rachet handle but a breaker bar just fit inside the fairing. I could have removed the fairing to gain more access but I did not.

Now I loosened the fork caps on top of the fork tube while the lower clamp bolts were still in place. Same deal, I want the lower clamp bolts to keep the fork tubes from turning while breaking the fork cap loose with a 17 mm wrench. Be careful of scratching the top of the cap and/or the top bridge of the fork. Just loosen the cap a couple of turns. Don't remove it yet - the spring inside is under pressure.
With the fork leg supported loosen the 14 mm lower clamp bolt. The fork leg will drop out and fall on the floor if you aren't ready for it.

With the tube in one hand and the 17 mm wrench in the other unscrew the fork cap. Turn the last few turns by hand prepared to catch the cap when it springs free. With the stock spring it won't fly off across the room but it can surprise you and fall onto the floor and dent or flatten one edge or muck up the threads on the underside of it.

Pull out the metal spacer on top of the spring.

I tipped the fork tube over so the oil runs out into a catch basin. The spring washer and spring will slide out. Wipe off the spring, washer, and spacer and put in a clean place. Turn the tube upside down and drain out most of the oil by pumping the tube into the leg a few times.

I made a little jig on the edge of the bench to hold fork tubes upside down over a basin. I leave them here for 15 or 20 minutes to drain. The oil is pretty dirty after just 17,250 miles.

While the tubes are draining measure the free length of the springs. There is a spec length of at least 387 mm for stock springs. Mine were 397 mm. Record this over time if you are interested to see if the springs sag. The springs in my ST1300 are original length at 120,000 miles.
After the tubes quit draining I spray a liberal quantity of brake cleaner into the tube and pump the tube into the leg to clean out the goop in the bottom of the legs and fork orifices. Turn the leg and tube upside and pump it dry. Fluid will remain in the fork bottom unless you pump it out. The diluted oil & cleaner that comes out should be clean. I let the forks drain upside down again for a few minutes then place them upright in the jig to completely dry.
I measured about 520 cc of SS-47 Honda fork oil in my beaker. Collapse the tube into the leg and pour in this amount into each fork leg for a total of about 1,040 cc for the entire job. The correct amount of oil will come up to a point 104 mm from the top of the fork tube. This is supposed to be 514 cc per leg but I pour in a little excess. If you prefer another brand of oil be advised that "weight" is not a good method to describe the qualities of light oils like this. A 5 wt oil in one brand can be thicker than the 10 wt oil in another brand but use what oil you like. I prefer to stay with the stock oil at least for a change or two. SS-47 is described as a 10wt oil by Honda so you could use Honda SS-8 which is another Honda 10wt oil.

I made a fork oil gauge with a syringe and a piece of vinyl tubing. The distance from the bottom of the syringe barrel to the tip of the tubing is 104 mm. I place the barrel against the top edge of the fork tube and suck out excess oil until it pulls air leaving a stock oil level of 104 mm.


Insert the spring with the tightly wound coils downward then the washer then the spacer. With the fork cap in place and held down with the palm of my right hand I turn the fork tube with my left hand to start the threads. Finish tightening the cap with the 17 mm wrench until you can turn no further. Insert the reassembled fork tube into the lower fork clamp until the top edge of the tube is flush with the top bridge and tighten the lower clamp bolt to hold in in place. Torque the lower clamp bolt to 29 ft. lbs. then tighten the fork cap to 16 ft. lbs. Only after the lower bolt and the fork cap are tightened did I torque the upper clamp allen bolt to 16 ft lbs. Repeat with the other leg. Reassemble the brake caliper to the fork leg. The caliper slips over the brake disc easy if you spread the pads apart before slipping it into place. Torque the caliper mounting bolts to 22 lbs. Honda says to replace them every time but I reuse them once or twice. Replace the fender and wheel to complete the job. The axle torque is 55 ft lbs, the axle pinch bolt 16 ft. lbs. Apply front brake until the pads contact the disc before riding the bike.
Last edited:
