I bought some Honda panniers on ebay after seeing a link in this forum. Nice boxes. They came with one key. Not unexpectedly, they would not open with my ignition key. Not wanting to carry around an extra key, I figured out how to re-key them so the panniers will open with my (Skookum's) ignition key. This post may sound complicated, but the process is NOT.
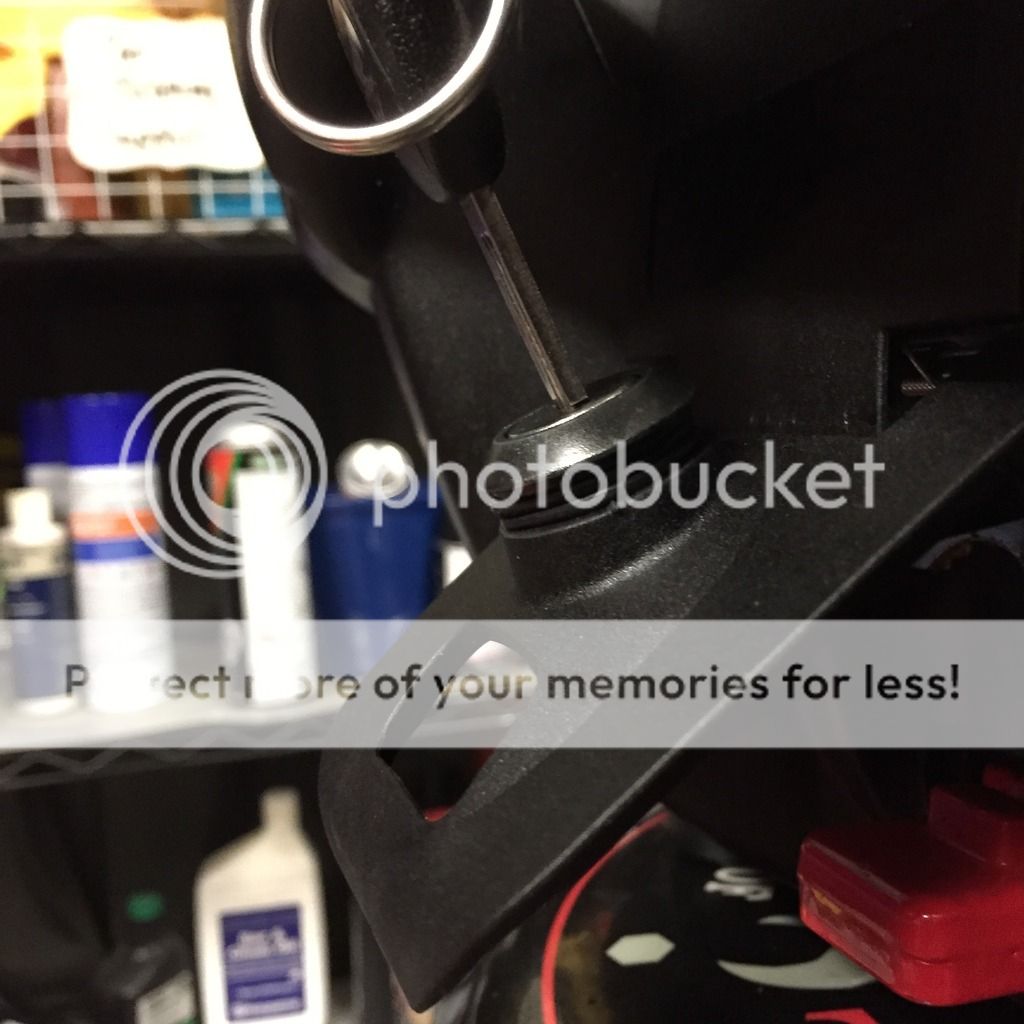
Open the carrying handle on the pannier and carefully remove the c-clip on the back of the lock assembly. I say carefully because if you aren't careful, the c-clip can pop off with considerable energy and will likely go flying across the garage - never to be seen again. Here is a pic with the c-clip halfway off.

After removing the c-clip, the latch (black steel), a flat washer, and a spring washer will come off the back end of the lock assy (in that order). Set these aside so you can re-install them properly after the re-keying process. The lock assy can now be removed from the handle of the pannier.
Insert the existing pannier key (the one that works now with your panniers) into the lock. If you look in the back end of the lock assy, inset about 1/4", is a small silver/goldish plate (it is the shiny spot at the 12:00 position in the picture). This plate is called the stopper tumbler and it is what prevents the inner lock cylinder from slipping out of the black outer cylinder. It is spring loaded so it pushes 'out' and engages a groove in the black outer cylinder. Sorry for the crappy picture.

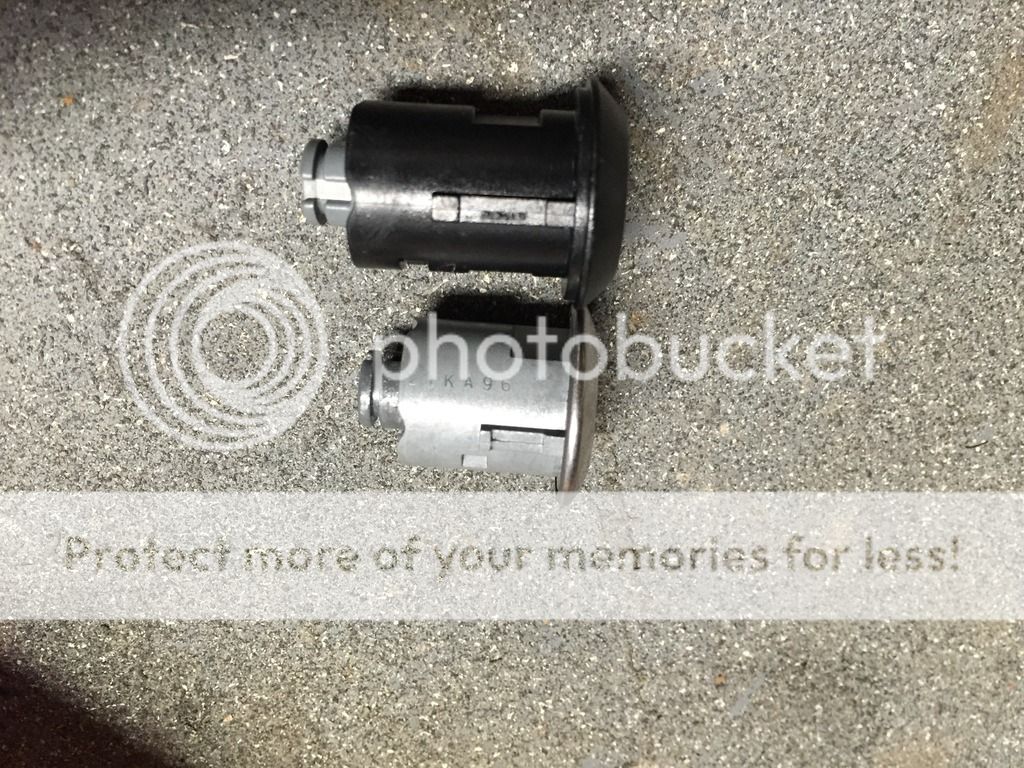
You have to reach in with something small (I used the tip of my pocketknife) and push that stopper gently towards the inner cylinder. When you have the stopper tumbler in the right spot, the entire inner cylinder (the guts of the lock) will begin to slide out of the black outer cylinder. As long as your key is inserted in the inner cylinder, there is no risk of pieces and parts flying all over the place. BUT...when you remove your key from the cylinder, be careful to hold the cylinder in such a way as to prevent the tumblers and springs from falling out. If you look closely, you can see small holes on the edge of each tumbler where the small springs live. Keep those spring holes 'up' so the tumblers and springs will not fall out of the cylinder when your key is removed. Here is a pic of the entire lock assy showing the inner cylinder, the outer cylinder, the washers, the latch and the c-clip. In this view of the inner cylinder, you can see the 5 locking tumblers and you can see the stopper tumbler.

A BRIEF LESSON IN KEYS AND KEY CODES- In the next photo, you can see the high spots and low spots (and medium depth spots) cut into the edges of the key that came with my panniers. These keys are cut with notches to three different depths and each of those depths relates directly to a number (1, 2, or 3) that makes up the key's code. In the photo, you can see the individual high, medium, and low spots on the edge of the key. The deepest cuts equate to 3's. The medium depth cuts are 2's. The widest parts of the key (least material taken off) equate to 1's. If you're following me so far, you can see that the first five code digits for this key would be 13213. Your ignition key coding works the same way but it is an 8 digit code. BTW... the code always starts at the tip of the key.

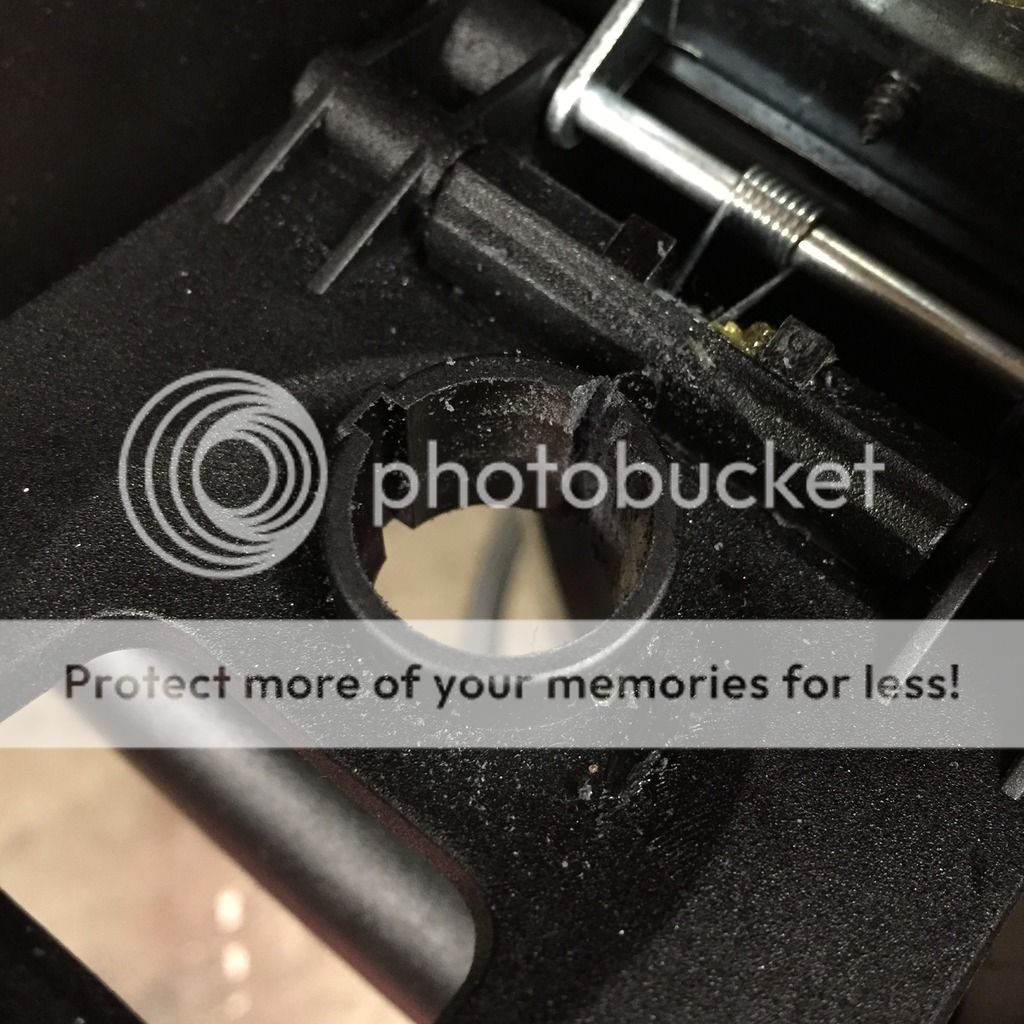
The inner cylinder has metal tumblers in it that are shaped to correspond with the different cuts on the key. When the correct key notch lines up with a tumbler of the correct shape, the tumbler is forced by the key into a position that allows the inner cylinder to turn. If a notch on a key does not align with a corresponding tumbler in that spot, the tumbler sticks out and prevents the inner cylinder from moving. NOTE - While our NC keys have 8 notches cut in them, the locks on the panniers only have five tumblers. That is why your ignition key does not slip all the way into the pannier locks. It only goes in deep enough to align the five tumblers with the first five notches on the key. Here is a “wrong” key inserted into a lock cylinder. Note that some tumblers are sticking out of the cylinder.

This is where it gets kinda fun... It just so happens, my ignition key is an 8 digit code that begins with 12331. Compare that with the key code above (which operates the panniers prior to this operation) and you can see that all I have to do is swap the second and third numbers (or tumblers) AND swap the fourth and fifth numbers (tumblers). That would change the pannier code from 13213 to 12331 (which matches my ignition key!).
The next picture shows the inner cylinder with all five of the locking tumblers laid on the table. If you look closely, right next to the slots where the tumblers came from, you can see small holes where the tumbler springs reside. DO NOT lose the springs nor mess up the position of these springs. Without the springs, the lock is useless. In the pic, you can also see the stopper tumbler (which is still in its slot)..

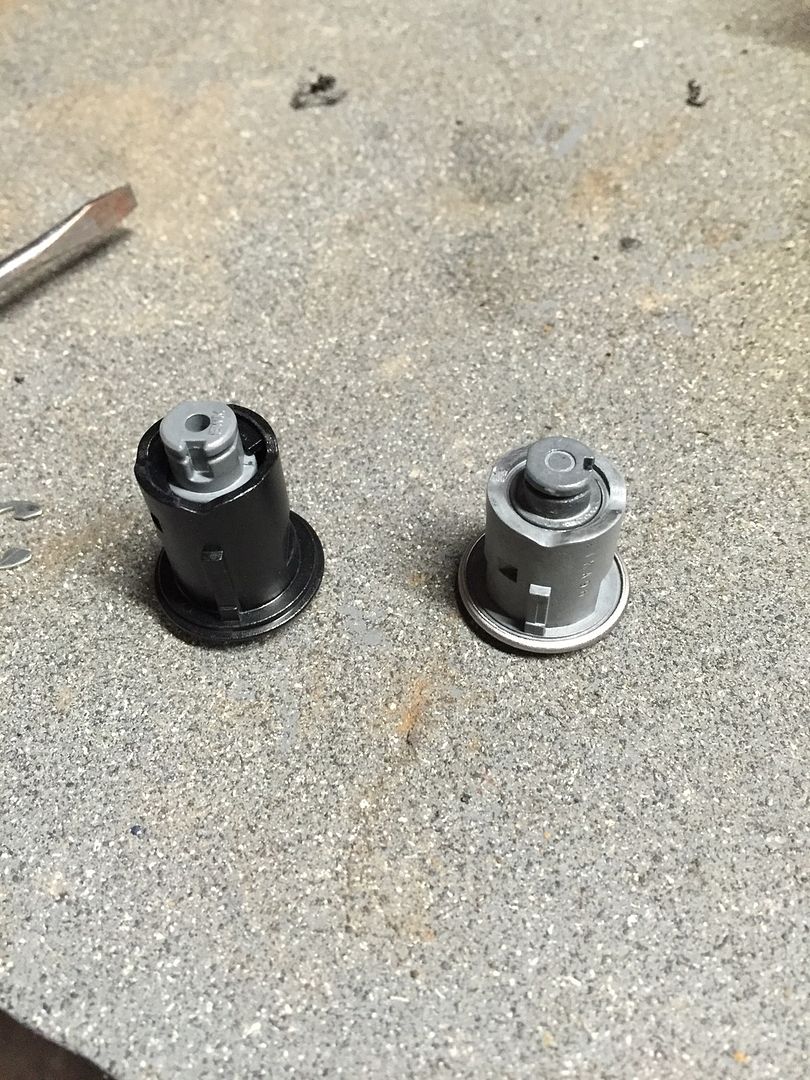
I moved the 4 tumblers described above and then inserted my ignition key and ...voila.... all the tumblers lined up perfectly. Now the lock code for this cylinder matches the first 5 digits of Skookum's ignition key - 12331 Here, you can see what the inner cylinder looks like with a 'correct' key inserted. Note that all of the tumblers are lined up flush with the cylinder body. This would equate to an "unlocked" position.
The cylinder on the left is from the other pannier and it shows what the cylinder looks like when no key is inserted. ALL of the tumblers are sticking out the 'top' of the cylinder because with no key to properly align the tumblers, the springs are pushing them into a completely "locked" position. In real-life, it only takes one incorrect tumbler to prevent a lock from opening.

Now, you just re-install everything the way it was when you started. The only slightly tricky part is lining things up so the inner cylinder slips back into the outer cylinder body. You do have to wiggle the stopper tumbler into position when you are starting the insertion process. If you look closely at the pieces involved, you will see that there are alignment pins and slots to make sure things go back together correctly. NOTHING needs to be forced or pounded on.
I would estimate that I could do this whole project again in about the same amount of time it takes to read this post.
>Thom
PS… In reviewing this post, something came up. Imagine, if you will, that your ignition key code and your pannier key code are WAY different from each other and you don't have enough of the correct tumblers to match your ignition key code's first 5 digits. No big deal. PM me and I can give you some options.
PPS... Since I just gave all of you "combination" to my panniers, I am trusting that none of you will rush out and have a key cut to match my pannier code, drive to Olympia, and steal everything out of my panniers. I am certain you are ALL more trustworthy than that...")
Open the carrying handle on the pannier and carefully remove the c-clip on the back of the lock assembly. I say carefully because if you aren't careful, the c-clip can pop off with considerable energy and will likely go flying across the garage - never to be seen again. Here is a pic with the c-clip halfway off.
After removing the c-clip, the latch (black steel), a flat washer, and a spring washer will come off the back end of the lock assy (in that order). Set these aside so you can re-install them properly after the re-keying process. The lock assy can now be removed from the handle of the pannier.
Insert the existing pannier key (the one that works now with your panniers) into the lock. If you look in the back end of the lock assy, inset about 1/4", is a small silver/goldish plate (it is the shiny spot at the 12:00 position in the picture). This plate is called the stopper tumbler and it is what prevents the inner lock cylinder from slipping out of the black outer cylinder. It is spring loaded so it pushes 'out' and engages a groove in the black outer cylinder. Sorry for the crappy picture.
You have to reach in with something small (I used the tip of my pocketknife) and push that stopper gently towards the inner cylinder. When you have the stopper tumbler in the right spot, the entire inner cylinder (the guts of the lock) will begin to slide out of the black outer cylinder. As long as your key is inserted in the inner cylinder, there is no risk of pieces and parts flying all over the place. BUT...when you remove your key from the cylinder, be careful to hold the cylinder in such a way as to prevent the tumblers and springs from falling out. If you look closely, you can see small holes on the edge of each tumbler where the small springs live. Keep those spring holes 'up' so the tumblers and springs will not fall out of the cylinder when your key is removed. Here is a pic of the entire lock assy showing the inner cylinder, the outer cylinder, the washers, the latch and the c-clip. In this view of the inner cylinder, you can see the 5 locking tumblers and you can see the stopper tumbler.
A BRIEF LESSON IN KEYS AND KEY CODES- In the next photo, you can see the high spots and low spots (and medium depth spots) cut into the edges of the key that came with my panniers. These keys are cut with notches to three different depths and each of those depths relates directly to a number (1, 2, or 3) that makes up the key's code. In the photo, you can see the individual high, medium, and low spots on the edge of the key. The deepest cuts equate to 3's. The medium depth cuts are 2's. The widest parts of the key (least material taken off) equate to 1's. If you're following me so far, you can see that the first five code digits for this key would be 13213. Your ignition key coding works the same way but it is an 8 digit code. BTW... the code always starts at the tip of the key.
The inner cylinder has metal tumblers in it that are shaped to correspond with the different cuts on the key. When the correct key notch lines up with a tumbler of the correct shape, the tumbler is forced by the key into a position that allows the inner cylinder to turn. If a notch on a key does not align with a corresponding tumbler in that spot, the tumbler sticks out and prevents the inner cylinder from moving. NOTE - While our NC keys have 8 notches cut in them, the locks on the panniers only have five tumblers. That is why your ignition key does not slip all the way into the pannier locks. It only goes in deep enough to align the five tumblers with the first five notches on the key. Here is a “wrong” key inserted into a lock cylinder. Note that some tumblers are sticking out of the cylinder.
This is where it gets kinda fun... It just so happens, my ignition key is an 8 digit code that begins with 12331. Compare that with the key code above (which operates the panniers prior to this operation) and you can see that all I have to do is swap the second and third numbers (or tumblers) AND swap the fourth and fifth numbers (tumblers). That would change the pannier code from 13213 to 12331 (which matches my ignition key!).
The next picture shows the inner cylinder with all five of the locking tumblers laid on the table. If you look closely, right next to the slots where the tumblers came from, you can see small holes where the tumbler springs reside. DO NOT lose the springs nor mess up the position of these springs. Without the springs, the lock is useless. In the pic, you can also see the stopper tumbler (which is still in its slot)..
I moved the 4 tumblers described above and then inserted my ignition key and ...voila.... all the tumblers lined up perfectly. Now the lock code for this cylinder matches the first 5 digits of Skookum's ignition key - 12331 Here, you can see what the inner cylinder looks like with a 'correct' key inserted. Note that all of the tumblers are lined up flush with the cylinder body. This would equate to an "unlocked" position.
The cylinder on the left is from the other pannier and it shows what the cylinder looks like when no key is inserted. ALL of the tumblers are sticking out the 'top' of the cylinder because with no key to properly align the tumblers, the springs are pushing them into a completely "locked" position. In real-life, it only takes one incorrect tumbler to prevent a lock from opening.
Now, you just re-install everything the way it was when you started. The only slightly tricky part is lining things up so the inner cylinder slips back into the outer cylinder body. You do have to wiggle the stopper tumbler into position when you are starting the insertion process. If you look closely at the pieces involved, you will see that there are alignment pins and slots to make sure things go back together correctly. NOTHING needs to be forced or pounded on.
I would estimate that I could do this whole project again in about the same amount of time it takes to read this post.
>Thom
PS… In reviewing this post, something came up. Imagine, if you will, that your ignition key code and your pannier key code are WAY different from each other and you don't have enough of the correct tumblers to match your ignition key code's first 5 digits. No big deal. PM me and I can give you some options.
PPS... Since I just gave all of you "combination" to my panniers, I am trusting that none of you will rush out and have a key cut to match my pannier code, drive to Olympia, and steal everything out of my panniers. I am certain you are ALL more trustworthy than that...
Last edited: