

admin
Staff member
Sykik SRTP-300 TPMS Review
Review Summary
Design & Features
Materials & Build Quality
Ease Of Use
Value For Money
Pros
Very easy to install and set up
Bright display for easy viewing in all lighting conditions
Takes a standard microUSB plug to charge
Has both Metric (Bar/Celcius) and Imperial (PSI/Fahrenheit) readouts, changed via the SET button
Cons
Battery lasts only about 6 hours of continuous use
Does not have a brightness adjustment, so is quite bright at night
Mounting system to its pedestal is a screw with a tension washer instead of a solid clip or locking system. Can see a possibility of it being shaken loose on an ADV
4.1
Buy Now
Sykik SRTP-300 Tire Pressure Monitoring System
On a motorcycle, we riders only have two tiny patches of contact with the road via our tires. Those tires are also made of a softer type of rubber than car tires, and are much more sensitive to pressure variances. For a car, if you’re a couple of PSI over, it doesn’t really hurt anything as the weight of the car evens out that pressure. On a motorcycle, a couple of PSI over the rated inflation means you could be rounding out your tire and wearing it down sooner.
This is why, as of late, a lot of motorcycles are coming with some form of a Tire Pressure Monitoring System (TPMS). You’ll definitely get one on a touring bike like a Honda Goldwing or a BMW R1250 GS, but it is bit of a gamble if you’ll get one on a bike that is less than $10,000. For those situations, a TPMS accessory is definitely a viable option.
Since my 2012 Kawasaki NInja 650 does not have a built-in TPMS, and I would sometimes wonder while riding what my tire inflation is actually at, I took it upon myself to spend the money and get an affordable TPMS system for my bike, the Sykik SRTP-300. While this may not be all that extensive a review as there are only so many features the system has, I have been using it since the start of the season in April 2023, and have come to a fair few conclusions about it.
Sykik Rider Accessories is one of those feel-good American success stories. Founder Parviz was inspired to start his company after he was rear ended on his Harley on the 405 in California, and had no evidence or footage of the car that had fled the scene. Once he launched Sykik in 2009, the very first product they sold was a dual camera system, a “dash cam” for motorcycles. What made it different than many was that Parviz was focused on the average rider and affordability, not the top end with big bank accounts.
Fast forward to 2023, and Sykik has expanded their product lineup to include everything from Bluetooth comms units to GPS tags so you can track your bike. They also make motorcycle alarm systems, and quality of life accessories such as TPMS systems. They are showing no signs of slowing down, and are still headquartered in the same office they started at in Los Angeles.
This product was personally purchased by myself, with no affiliation or contact from or to Sykik. Even if I had been in contact with them, we do not allow brands to influence review scores or content. Please see our review policies for more information.
We here at webBikeWorld believe that you can’t just try something out once and give an honest opinion of it. Any product we test is actually used by our testers, and as such, I have used the Sykik SRTP-300 throughout the entire 2023 season, no matter the weather, riding conditions, or other accessories on my motorcycle.
The Sykik SRTP-300 TPMS system works via a wireless connection to two tiny sensors that screw onto the ends of your tires valve stems, held in place by a locking nut, and reporting every second or so to a display unit mounted on your handlebars.
That display has a 1.5 inch LCD screen that has your tire pressure in big white numbers, and the temperature of the air in your tires as well in smaller green numbers beside it. The display mounts to a metal handlebar stem that can fit up to 1.25 inch diameter bars, and comes with anti-vibration rubber strips. The display mounts via a ¼ inch screw hole in the back of the unit, and is held in place by the ¼ inch screw and tension washer included in the packaging.

What comes in the box. I had unfortunately started to mount everything on my bike before I remembered I needed to take pictures of it! Whoops! Not included in the image is the metal mounting stem and the antivibration strip it comes with
The sensors are clearly labeled front and rear, and are installed by removing the current cap on your valve stems, screwing on a locking nut, and then screwing the sensor on. You then back the nut up the stem until it becomes finger tight against the sensor, and use the included wrench to tighten it a quarter turn more.

Here’s the stem and the antivibration strip mounted on the handlebars of my bike. I used Loctite on the screws, so it’s pretty solidly on there!
As for what the unit can do, it should be noted up front that both the sensors and display unit are completely waterproof. The display itself allows for you to view your tire pressures and internal air temperature in both Metric, meaning Bar and Celcius, or Imperial, meaning PSI and Fahrenheit. You can set alarm conditions for temperatures and pressures, however the unit also comes preprogrammed with alarm conditions.

The important bits: The main display unit and the front and rear sensors!
Those alarm conditions are 150 or higher F, danger pressure low of 27 PSI, and danger pressure high of 45 PSI. If any of them are reached, the display flashes on and off with bright red numbers to attract your attention. You can adjust those settings to as high as 87 PSI, as low as 20 PSI, while the temperature alarm cannot be changed but your tires shouldn’t be getting to 150 F anyways!
The sensors also use a tiny CR1225 watch battery as their power source and are extremely-low-draw units, so the battery should, by manufacturers claims, last a full season without issue. They are replaced by opening the sensors with the reverse end of the included wrench, and Sykik state that the whole process per sensor should take a maximum of 10 minutes, if that.
The display unit uses a rechargeable battery, but because of the compactness and size of the unit, that battery is only good for about 6 hours of continuous use per charge. I do have to knock a few points off for that, as there are rechargeable batteries out there these days that can last 10 to 12 hours per charge and small enough to fit in the display unit. Maybe something to look for in a Version 2, if they ever make one!
As my motorcycle has metal stems, I chose the SRTP-300 unit. If you have rubber stems, there is another version called the SRTP-400 that replaces the current stems in your rims with Sykik ones. If you’d rather have the ability to use an app on your smartphone for monitoring, they also sell the SRTP-210 unit, which includes just the sensors
For something that, at the time I bought it, was less than $70, I am quite pleasantly surprised at just how solid the unit feels, and how bright and readable the display is.

On the right hand side: The SET button up top, and the option selection button on the bottom
It’s not going to win any industry awards for being made out of bulletproof materials, but the buttons have a very positive, tactile feel to them, and the unit’s plastic case doesn’t creak or make cracking sounds as you screw it onto its handlebar stem.
The sensors also feel very solid, and screw on with metal threading so there is no chance that a plastic thread might wear down or snap suddenly.

The right side has a rubber flap over the microUSB port for charging, making sure no water gets in if you ride in the rain
Overall, it feels really well made, has a clear display, and nice, tactile buttons.
Once you have the sensors on your wheel stems, and the handlebar stem tightened down and ready, all you need to do is charge up the display unit before you set off. Because it has a small battery and doesn’t need to do much more than power a wireless receiver and a display, it charges incredibly quickly on a standard 5V microUSB cable, one of which is included in the box, in the range of about 30 minutes for a full charge if you recharged it with one bar of its battery readout remaining.
To set up the system with the pressure sensors installed, you press the bottom right button for 3 seconds to turn the unit on, then press the upper right button “SET” five times. The unit will blink the pressure readout area, meaning it’s in pairing mode, and you then press the lower right button to select the tire you want to pair.

My handlebars with the display unit mounted and on. (Yes, I know there is a panel gap on the left, the little plastic tab inside snapped off in my first week of owning the bike in 2021
 )
)
The unit will automatically search for the sensor, and once it connects, it will read out pressure and temperature. Once that’s done, while it’s still blinking, you press and hold SET for 5 seconds. Repeat the same procedure for the rear tire, pressing the bottom right button twice to find the rear sensor instead of the front, and voila, you’re ready to ride.
To change the readout units, which can be any combination of Metric and Imperial you want, simply press the SET button for a couple of seconds, click the bottom right button until BAR PSI or C F are displayed, then press SET, bottom right button to choose your unit, then press and hold SET for 5 seconds to save.
When Sykik stated that they wanted to make the unit extremely easy to set up and start riding with, they were not joking! I honestly had the sensors and stem installed while charging the display, then set up the unit as described above in a grand total of about 20 minutes. I am not the world’s greatest wrencher, and it takes me a few hours to do an oil change because of the filter’s location behind the exhaust headers in the most inaccessible place possible, and yet setting up the Sykik was almost easier than brushing my teeth that morning.
Major points for ease of use!
The first thing I encountered when I went riding after installing the SRTP-300 was that I noticed my rear tire was 2 PSI under the 36 PSI it should be. As I had brought along the little wrench from the package along, off to the gas station to give it a quick squirt of air to get it to the correct inflation.

The display unit is very clear and concise. This is before setting off on the day it was 30+ C (86+ F) in the middle of the Summer, the tires were already that warm!
That, alone, provided me with all the reasons I needed to keep using the system, but as I had to do a full test, I continued riding. Throughout the 2023 season, we have had some of the wildest weather in Calgary, Alberta, Canada. We’ve had heat wave level temperatures soaring past 30 C (86 F), which for a Canadian is “bloody hot,” all the way down to chilly 5 C (41 F) nights that almost made frost appear on the grass.
Throughout it all, the thing I noticed the most when at a stop light and checking the display unit is how the air temperature inside the tires varied. While the cold PSI values were a constant 32/36 front to rear (the right pressures for my year of Ninja 650), the warm PSI values were almost always within a PSI of each other, at 38/42 front to rear.

The front sensor was a bit harder to mount due to the brake discs, but it took all of about 2 minutes to get it all on there and tighten the nut back up against the sensor
Yet, the temperatures varied wildly, from as cold as 35 C (95 F) to 55 C (131 F), depending on the ambient temperature. It was a nice bit of insight into how much temperature and pressure can fluctuate while riding on the road! Also, for reference, I am currently on Michelin Pilot Sport Road 4 tires, which are quite decent sport touring tires. I suspect with a softer, more aggressive sport tire, the temperature would spike a bit higher on the hot days.
I was also able to test out the waterproofing of the unit by having to ride through a sudden thunderstorm that formed when I was more than 30 minutes away from my garage. Despite getting absolutely pelted by rain, it kept reading true the whole time and never once even thought about flickering.

The rear sensor was a much easier install, took about 60 seconds total to get it on and the nut backed up against it
One of my main concerns about the whole setup the entire season was how the display unit attaches to its metal stem. While there is a ¼ inch screw that holds it in the stem, the only thing preventing it flopping around or spinning is a tension washer that has a fairly strong spring to it. Despite riding on some of the rougher roads around town, and demounting, remounting, and otherwise having to tighten and loosen it a lot for taking it inside to charge, that washer has stayed strong and the unit hasn’t budged.
That said, it has only been a season, and as with all things, including the bike, time and use does wear things down. I suspect at this rate that I’ll probably need to replace the washer in a season or two, as it isn’t immovable, just pretty strong with its spring-back force. Just as a shock absorber can wear out, so can that little washer.
For what it is, the Sykik SRTP-300 TPMS system, which is currently selling ~$77 straight from Sykik, does exactly what it says it does on the box. It won’t make waffles, it won’t magically add 15 HP to your bike, but it will accurately and reliably tell you your tire pressures and temperatures when you want to know them.
The only real hiccups I can see with the unit is if you have a handlebar that is thicker than 1.25 inches so you can’t squeeze the stem on, but even Sykik themselves say to use a bit of 3M adhesive backed Velcro on a flat surface in your dash area and it will happily work mounted flat like that.
Sykik has also been intelligent about how to power the unit and sensors. While the display unit uses a rechargeable battery that should last it a few years, the sensors use a tiny watch battery in an ultra-low-draw setup, and cost less than $5 to replace the batteries in both sensors.
It’s affordable, not cheap, because it works and does precisely what it was designed to do. In today’s world of trying to squeeze every last feature into a device, it’s refreshing to find something that just is what it is.
Basically, if your bike doesn’t have a TPMS system included, and you want that extra peace of mind that knowing your tires are at their optimal cold and warm pressures, for less than $80 you really can’t go wrong here.
The post Sykik SRTP-300 TPMS Review appeared first on webBikeWorld.
Continue reading...
Review Summary
Design & Features
Materials & Build Quality
Ease Of Use
Value For Money
Pros
Very easy to install and set up
Bright display for easy viewing in all lighting conditions
Takes a standard microUSB plug to charge
Has both Metric (Bar/Celcius) and Imperial (PSI/Fahrenheit) readouts, changed via the SET button
Cons
Battery lasts only about 6 hours of continuous use
Does not have a brightness adjustment, so is quite bright at night
Mounting system to its pedestal is a screw with a tension washer instead of a solid clip or locking system. Can see a possibility of it being shaken loose on an ADV
4.1
Buy Now
Sykik SRTP-300 Tire Pressure Monitoring System
On a motorcycle, we riders only have two tiny patches of contact with the road via our tires. Those tires are also made of a softer type of rubber than car tires, and are much more sensitive to pressure variances. For a car, if you’re a couple of PSI over, it doesn’t really hurt anything as the weight of the car evens out that pressure. On a motorcycle, a couple of PSI over the rated inflation means you could be rounding out your tire and wearing it down sooner.
This is why, as of late, a lot of motorcycles are coming with some form of a Tire Pressure Monitoring System (TPMS). You’ll definitely get one on a touring bike like a Honda Goldwing or a BMW R1250 GS, but it is bit of a gamble if you’ll get one on a bike that is less than $10,000. For those situations, a TPMS accessory is definitely a viable option.
Since my 2012 Kawasaki NInja 650 does not have a built-in TPMS, and I would sometimes wonder while riding what my tire inflation is actually at, I took it upon myself to spend the money and get an affordable TPMS system for my bike, the Sykik SRTP-300. While this may not be all that extensive a review as there are only so many features the system has, I have been using it since the start of the season in April 2023, and have come to a fair few conclusions about it.
About Sykik
Sykik Rider Accessories is one of those feel-good American success stories. Founder Parviz was inspired to start his company after he was rear ended on his Harley on the 405 in California, and had no evidence or footage of the car that had fled the scene. Once he launched Sykik in 2009, the very first product they sold was a dual camera system, a “dash cam” for motorcycles. What made it different than many was that Parviz was focused on the average rider and affordability, not the top end with big bank accounts.
Fast forward to 2023, and Sykik has expanded their product lineup to include everything from Bluetooth comms units to GPS tags so you can track your bike. They also make motorcycle alarm systems, and quality of life accessories such as TPMS systems. They are showing no signs of slowing down, and are still headquartered in the same office they started at in Los Angeles.
About webBikeWorld’s Review Policy
This product was personally purchased by myself, with no affiliation or contact from or to Sykik. Even if I had been in contact with them, we do not allow brands to influence review scores or content. Please see our review policies for more information.
We here at webBikeWorld believe that you can’t just try something out once and give an honest opinion of it. Any product we test is actually used by our testers, and as such, I have used the Sykik SRTP-300 throughout the entire 2023 season, no matter the weather, riding conditions, or other accessories on my motorcycle.
Sykik SRTP-300 TPMS Features
Features
The Sykik SRTP-300 TPMS system works via a wireless connection to two tiny sensors that screw onto the ends of your tires valve stems, held in place by a locking nut, and reporting every second or so to a display unit mounted on your handlebars.
That display has a 1.5 inch LCD screen that has your tire pressure in big white numbers, and the temperature of the air in your tires as well in smaller green numbers beside it. The display mounts to a metal handlebar stem that can fit up to 1.25 inch diameter bars, and comes with anti-vibration rubber strips. The display mounts via a ¼ inch screw hole in the back of the unit, and is held in place by the ¼ inch screw and tension washer included in the packaging.
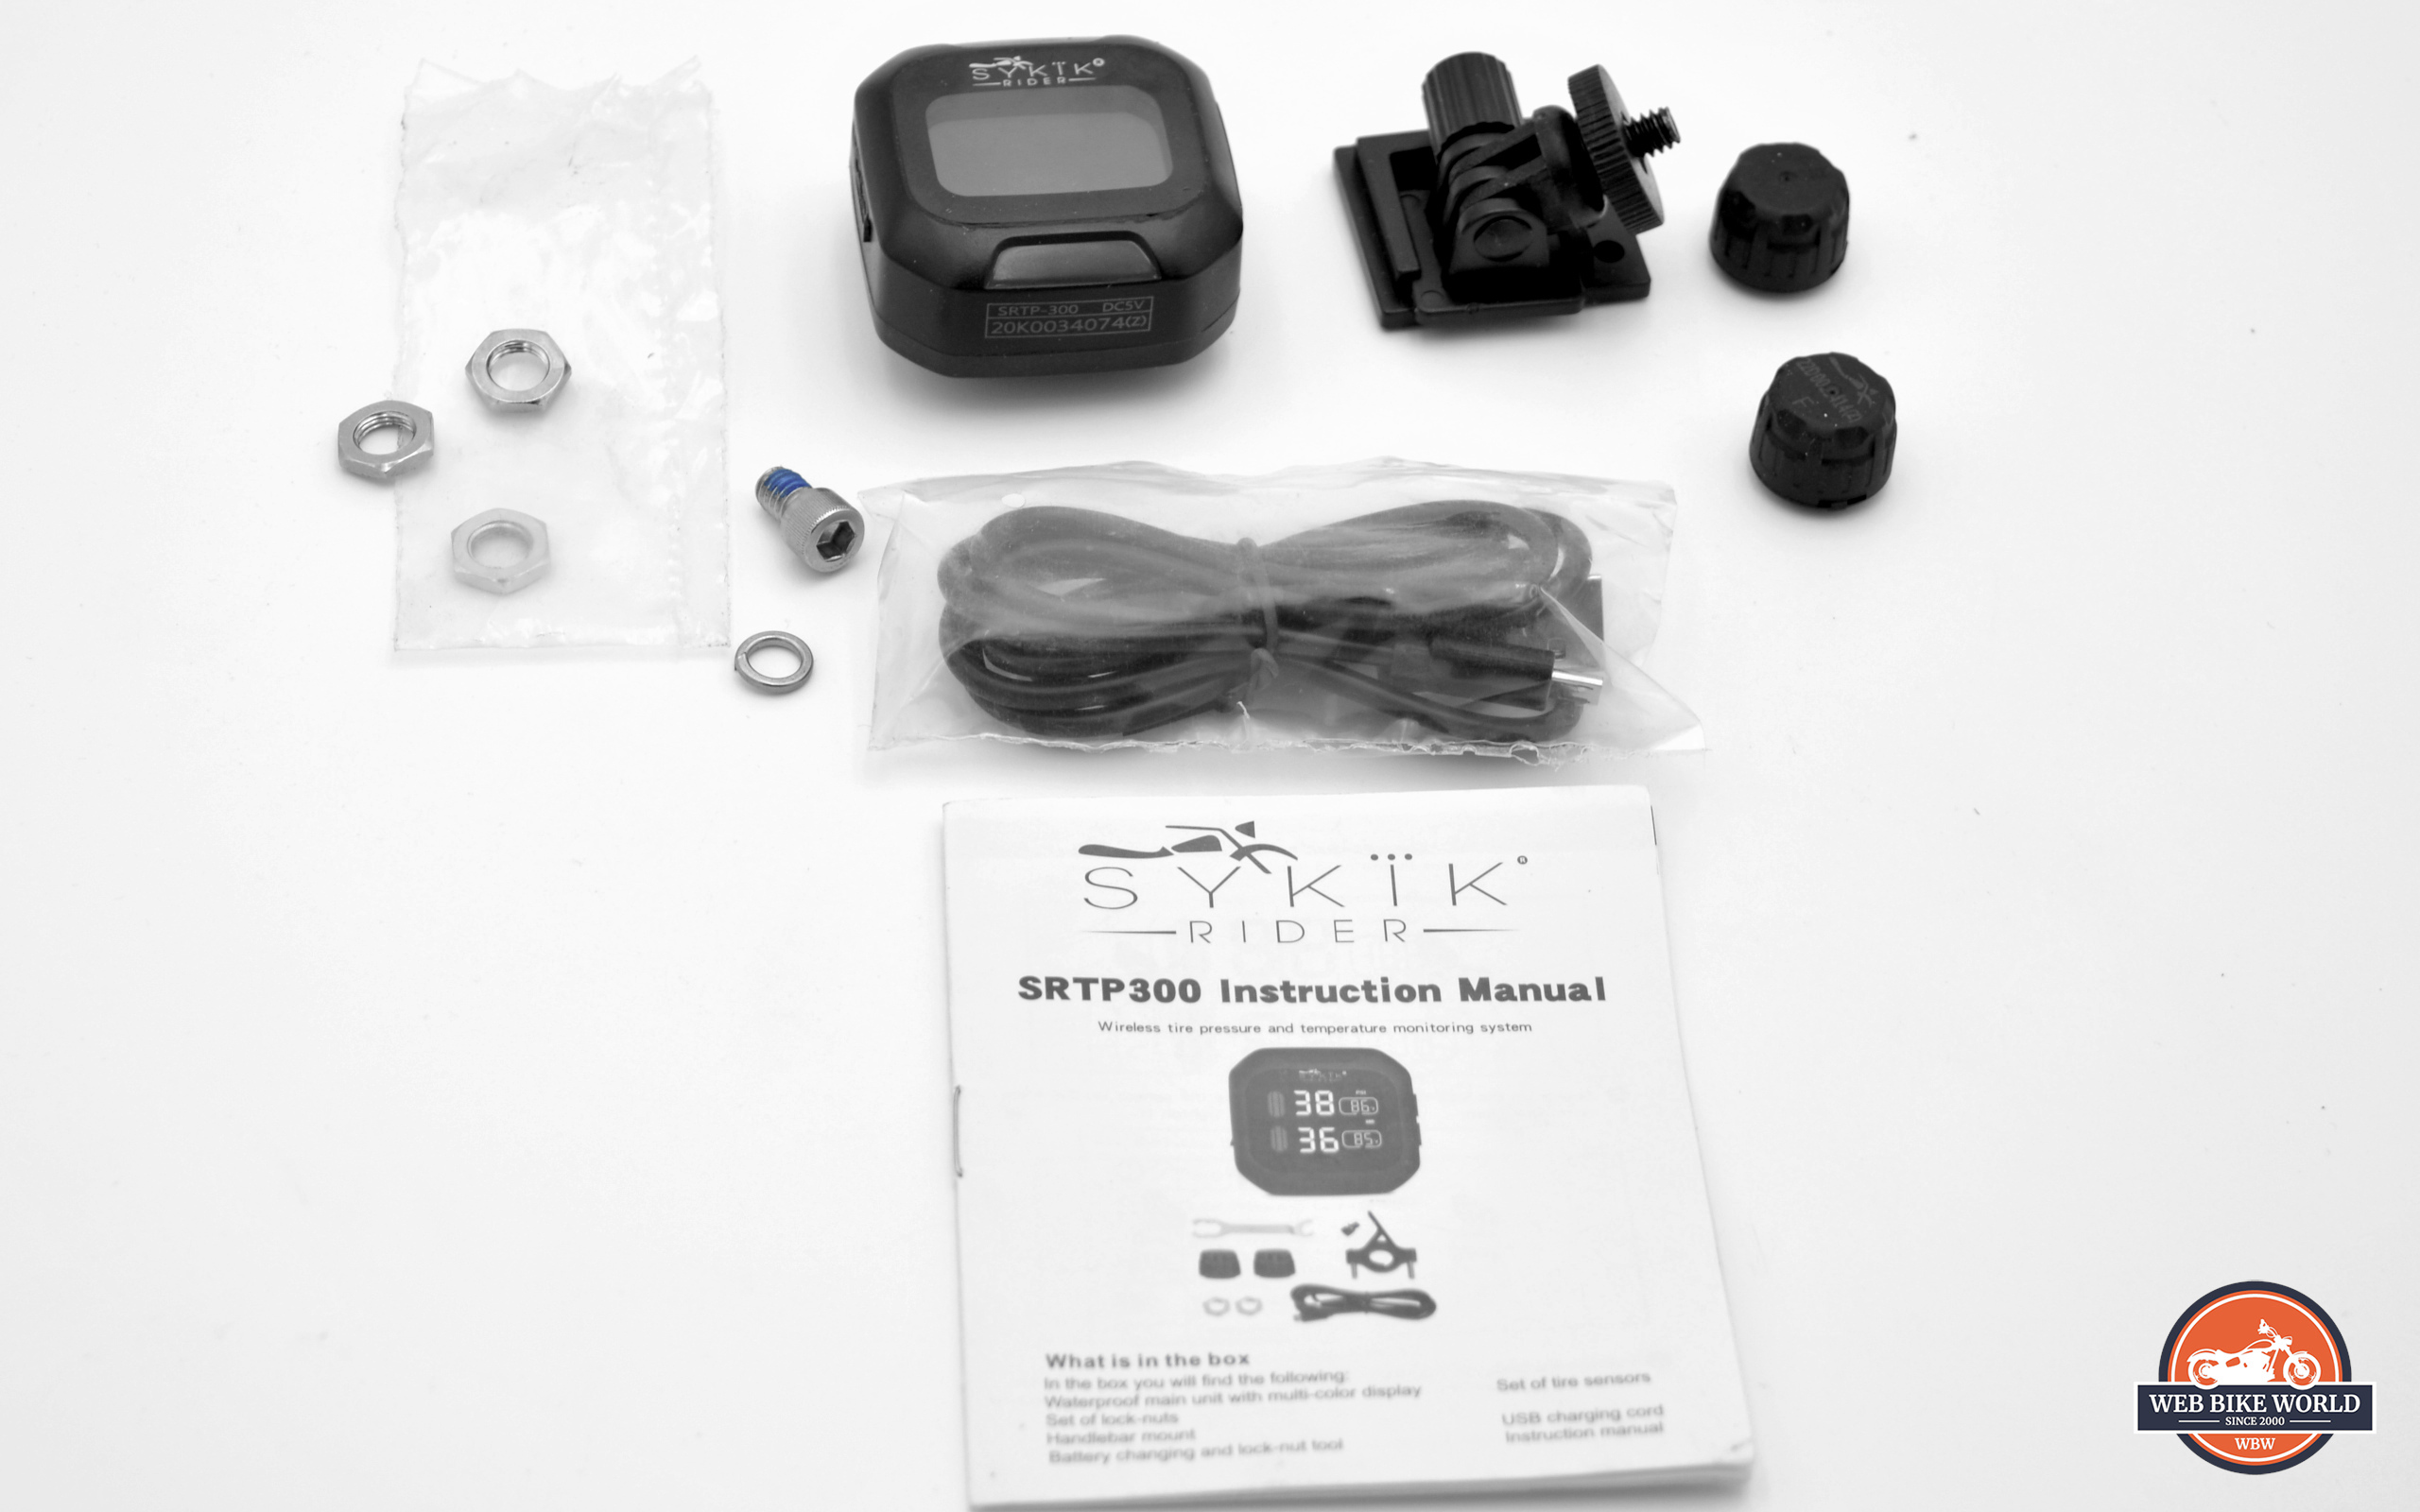
What comes in the box. I had unfortunately started to mount everything on my bike before I remembered I needed to take pictures of it! Whoops! Not included in the image is the metal mounting stem and the antivibration strip it comes with
The sensors are clearly labeled front and rear, and are installed by removing the current cap on your valve stems, screwing on a locking nut, and then screwing the sensor on. You then back the nut up the stem until it becomes finger tight against the sensor, and use the included wrench to tighten it a quarter turn more.
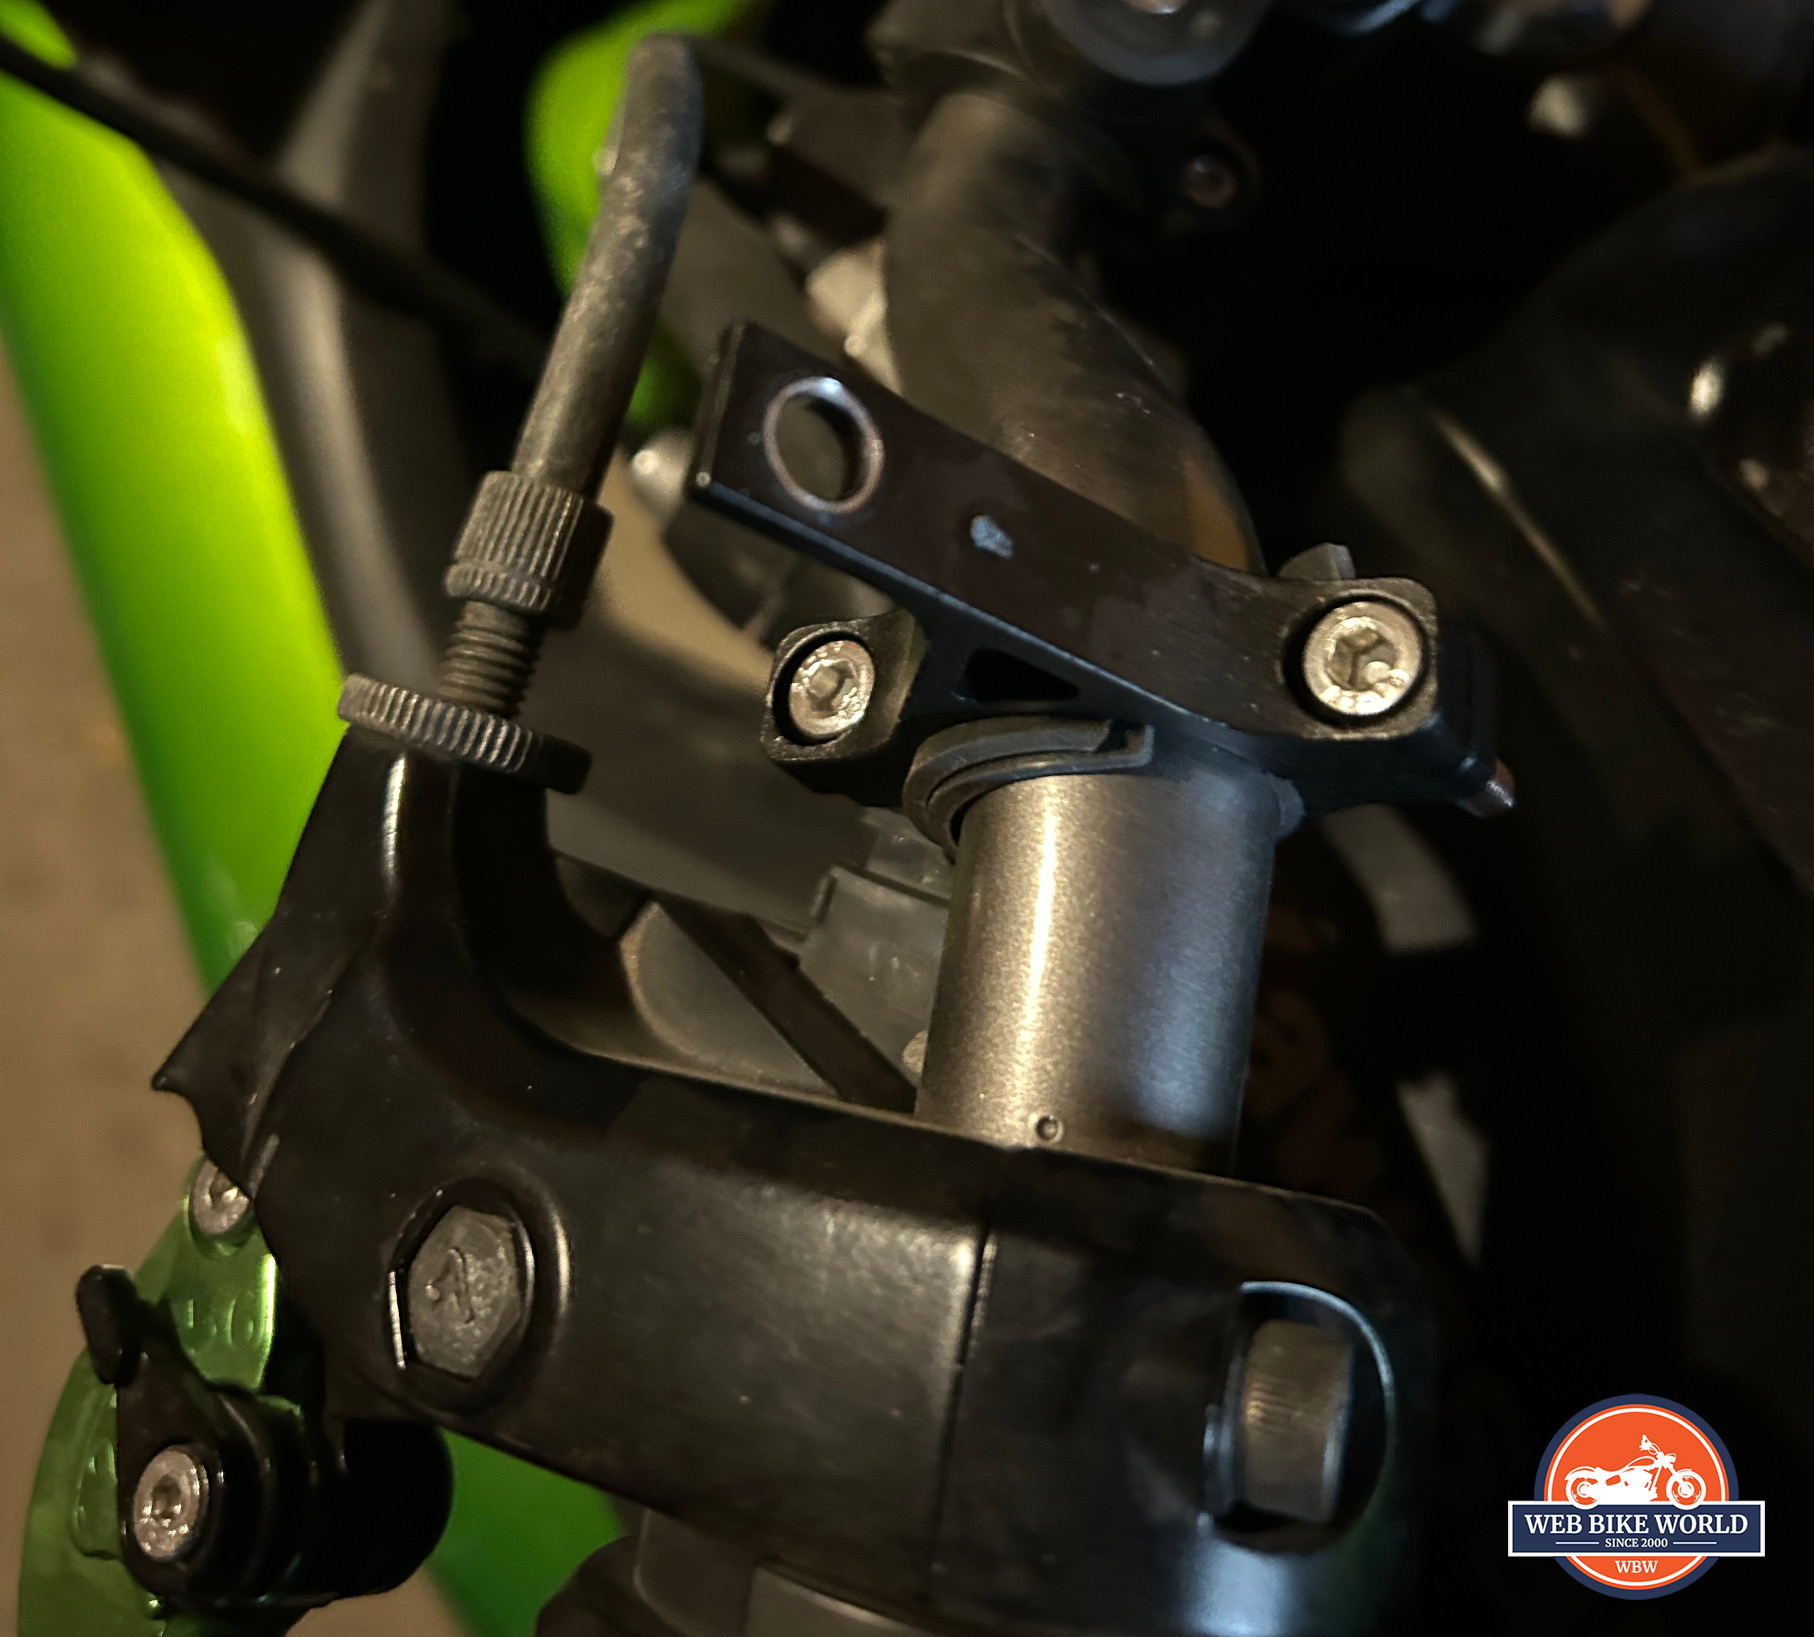
Here’s the stem and the antivibration strip mounted on the handlebars of my bike. I used Loctite on the screws, so it’s pretty solidly on there!
As for what the unit can do, it should be noted up front that both the sensors and display unit are completely waterproof. The display itself allows for you to view your tire pressures and internal air temperature in both Metric, meaning Bar and Celcius, or Imperial, meaning PSI and Fahrenheit. You can set alarm conditions for temperatures and pressures, however the unit also comes preprogrammed with alarm conditions.
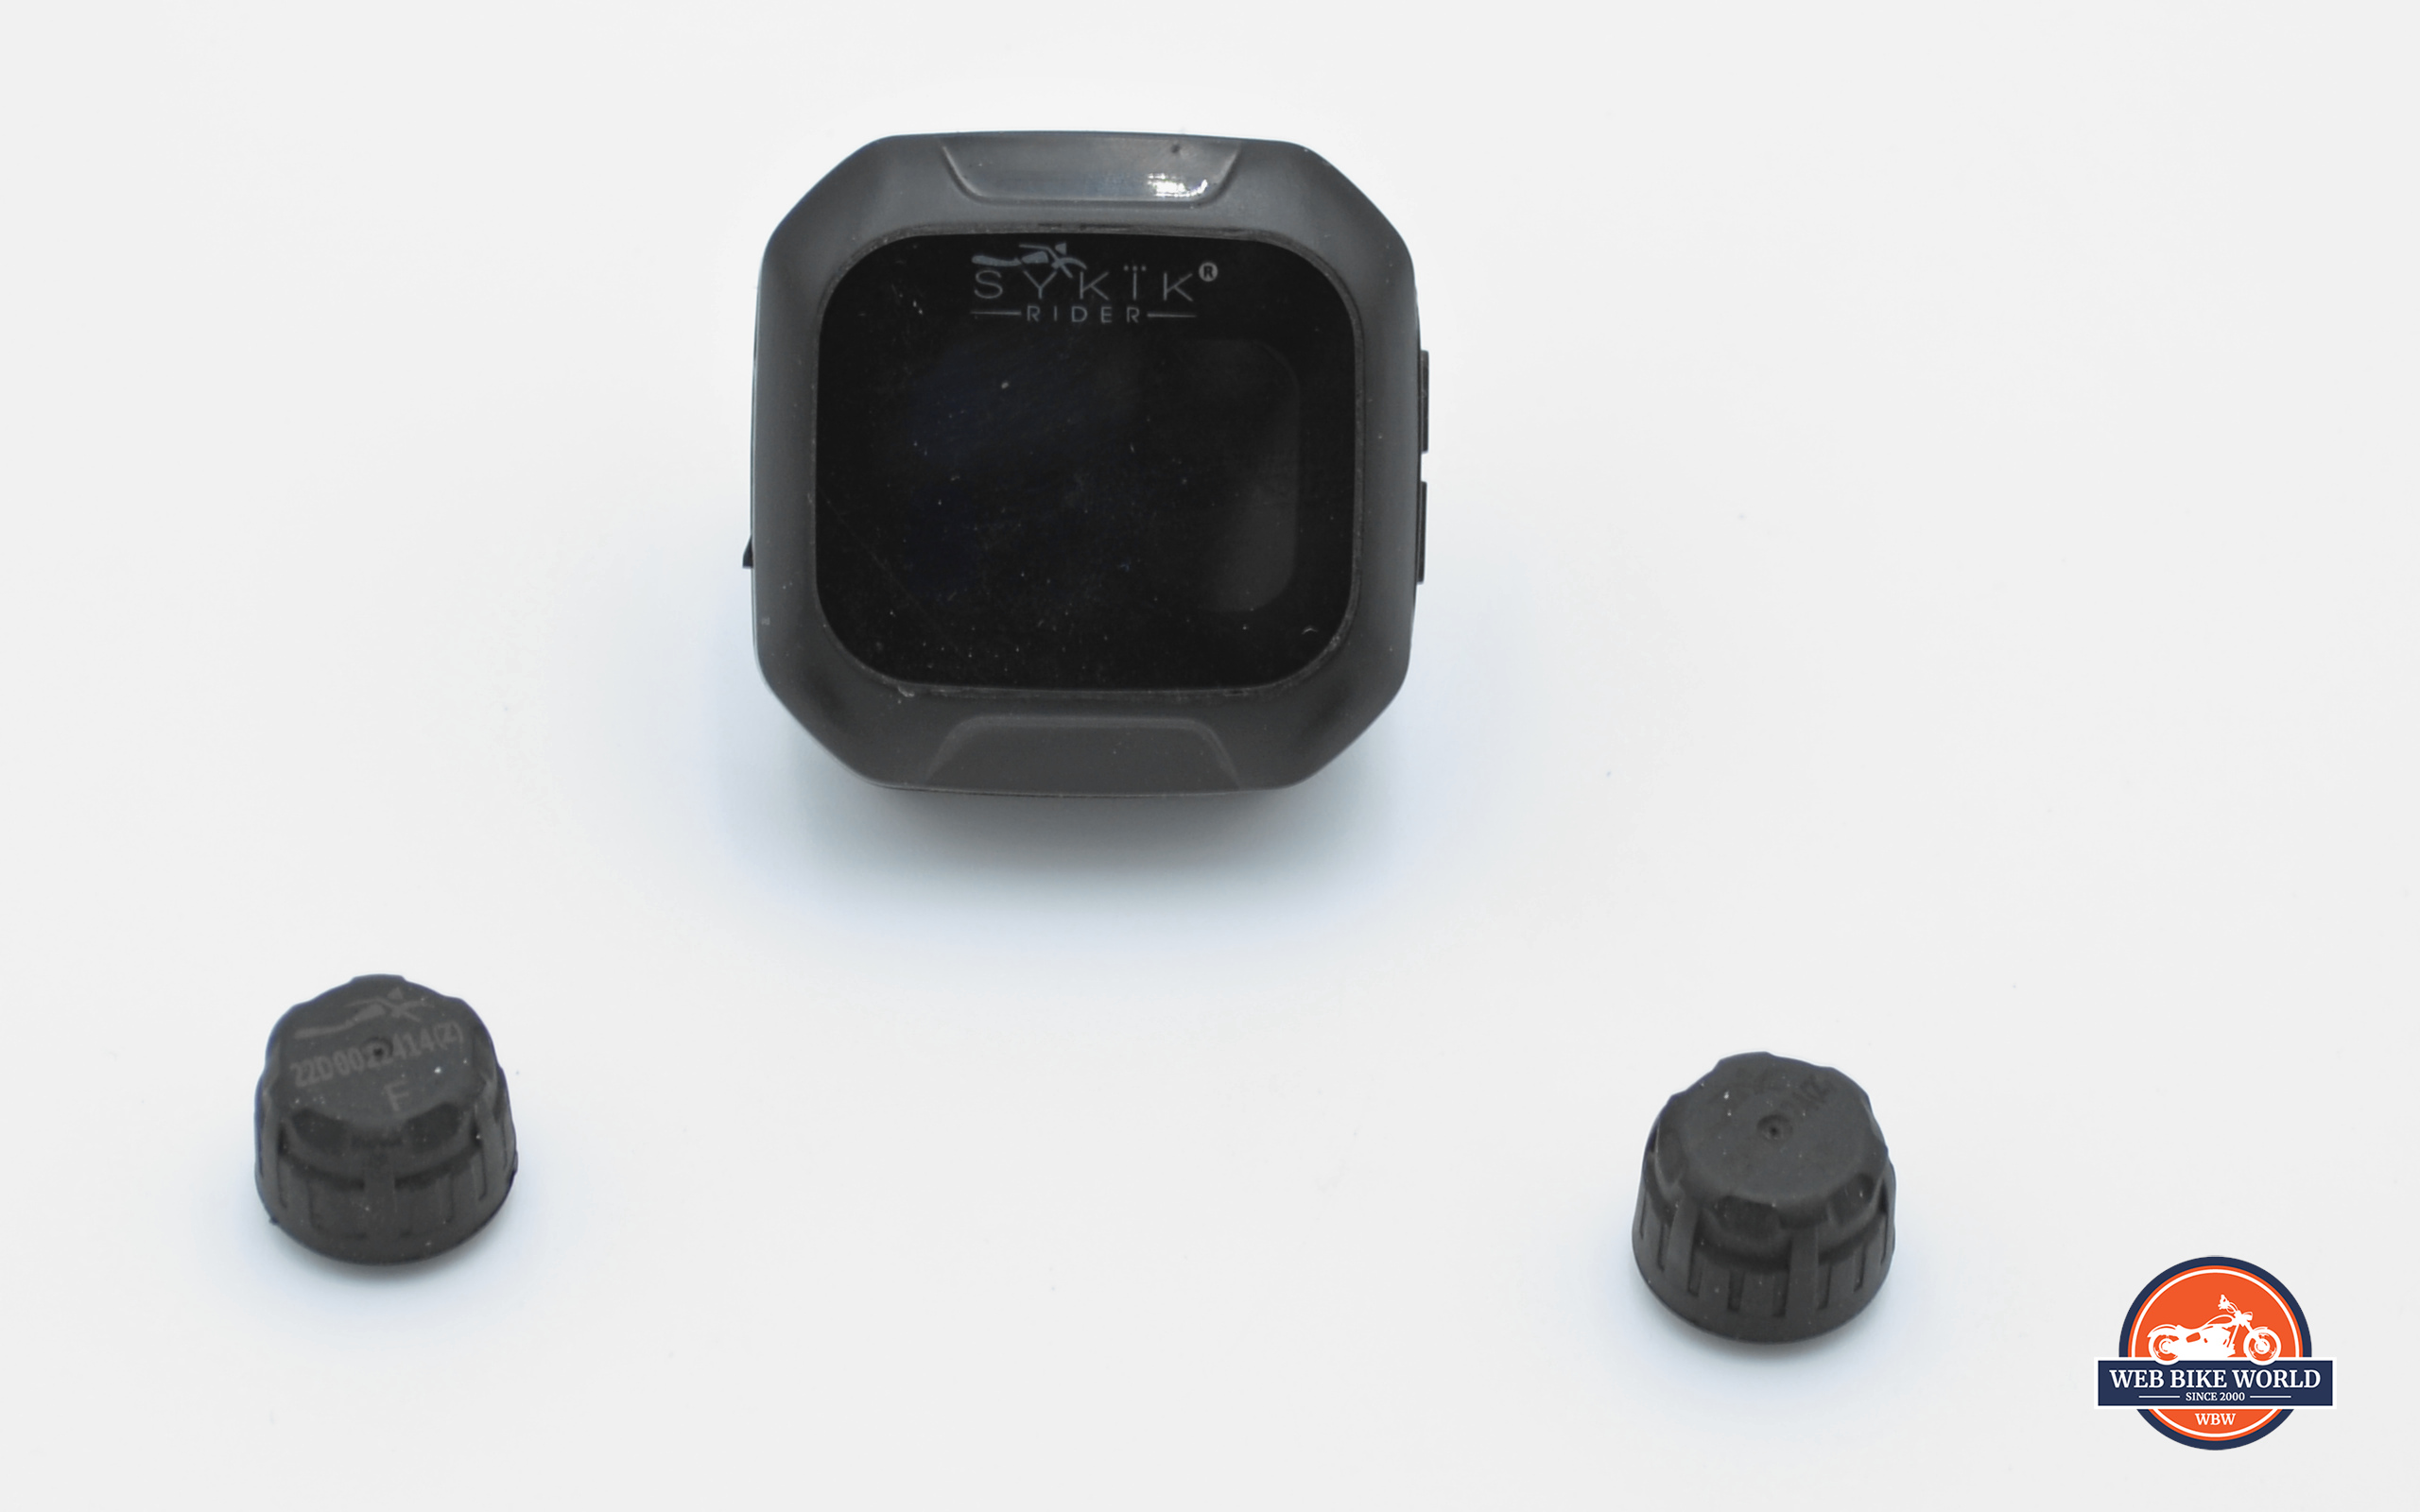
The important bits: The main display unit and the front and rear sensors!
Those alarm conditions are 150 or higher F, danger pressure low of 27 PSI, and danger pressure high of 45 PSI. If any of them are reached, the display flashes on and off with bright red numbers to attract your attention. You can adjust those settings to as high as 87 PSI, as low as 20 PSI, while the temperature alarm cannot be changed but your tires shouldn’t be getting to 150 F anyways!
The sensors also use a tiny CR1225 watch battery as their power source and are extremely-low-draw units, so the battery should, by manufacturers claims, last a full season without issue. They are replaced by opening the sensors with the reverse end of the included wrench, and Sykik state that the whole process per sensor should take a maximum of 10 minutes, if that.
The display unit uses a rechargeable battery, but because of the compactness and size of the unit, that battery is only good for about 6 hours of continuous use per charge. I do have to knock a few points off for that, as there are rechargeable batteries out there these days that can last 10 to 12 hours per charge and small enough to fit in the display unit. Maybe something to look for in a Version 2, if they ever make one!
Variants
As my motorcycle has metal stems, I chose the SRTP-300 unit. If you have rubber stems, there is another version called the SRTP-400 that replaces the current stems in your rims with Sykik ones. If you’d rather have the ability to use an app on your smartphone for monitoring, they also sell the SRTP-210 unit, which includes just the sensors
Build Quality
For something that, at the time I bought it, was less than $70, I am quite pleasantly surprised at just how solid the unit feels, and how bright and readable the display is.
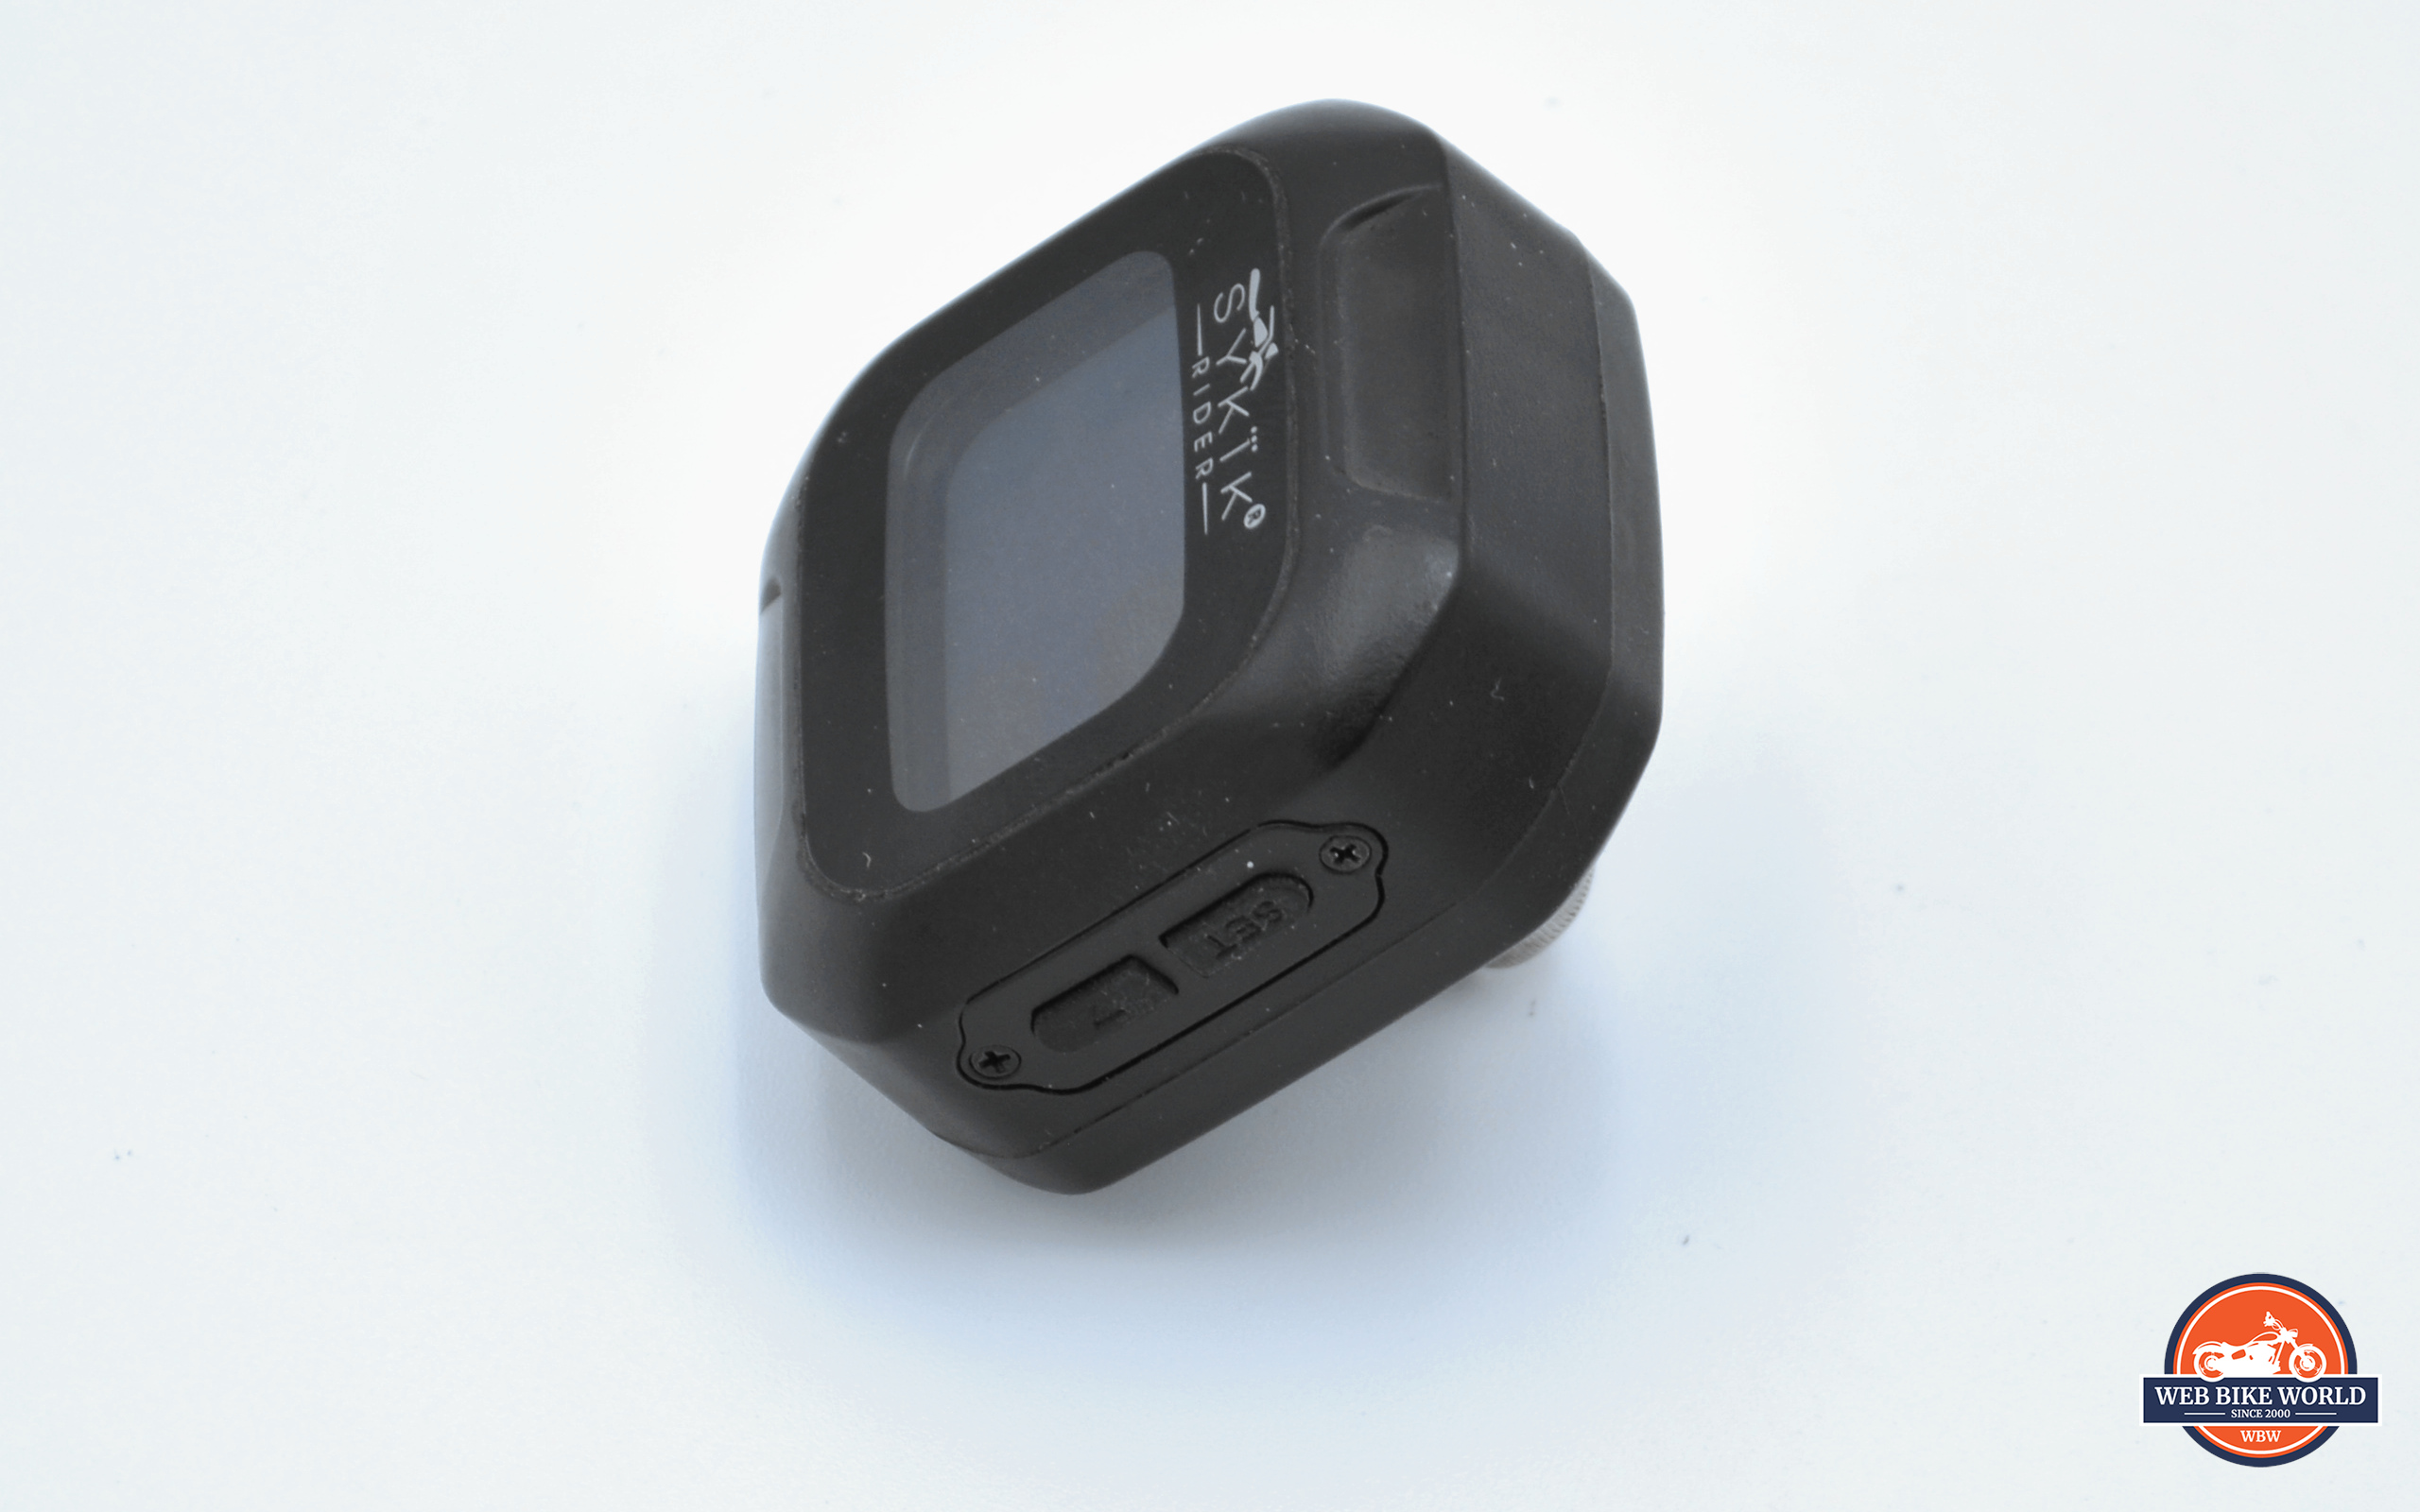
On the right hand side: The SET button up top, and the option selection button on the bottom
It’s not going to win any industry awards for being made out of bulletproof materials, but the buttons have a very positive, tactile feel to them, and the unit’s plastic case doesn’t creak or make cracking sounds as you screw it onto its handlebar stem.
The sensors also feel very solid, and screw on with metal threading so there is no chance that a plastic thread might wear down or snap suddenly.
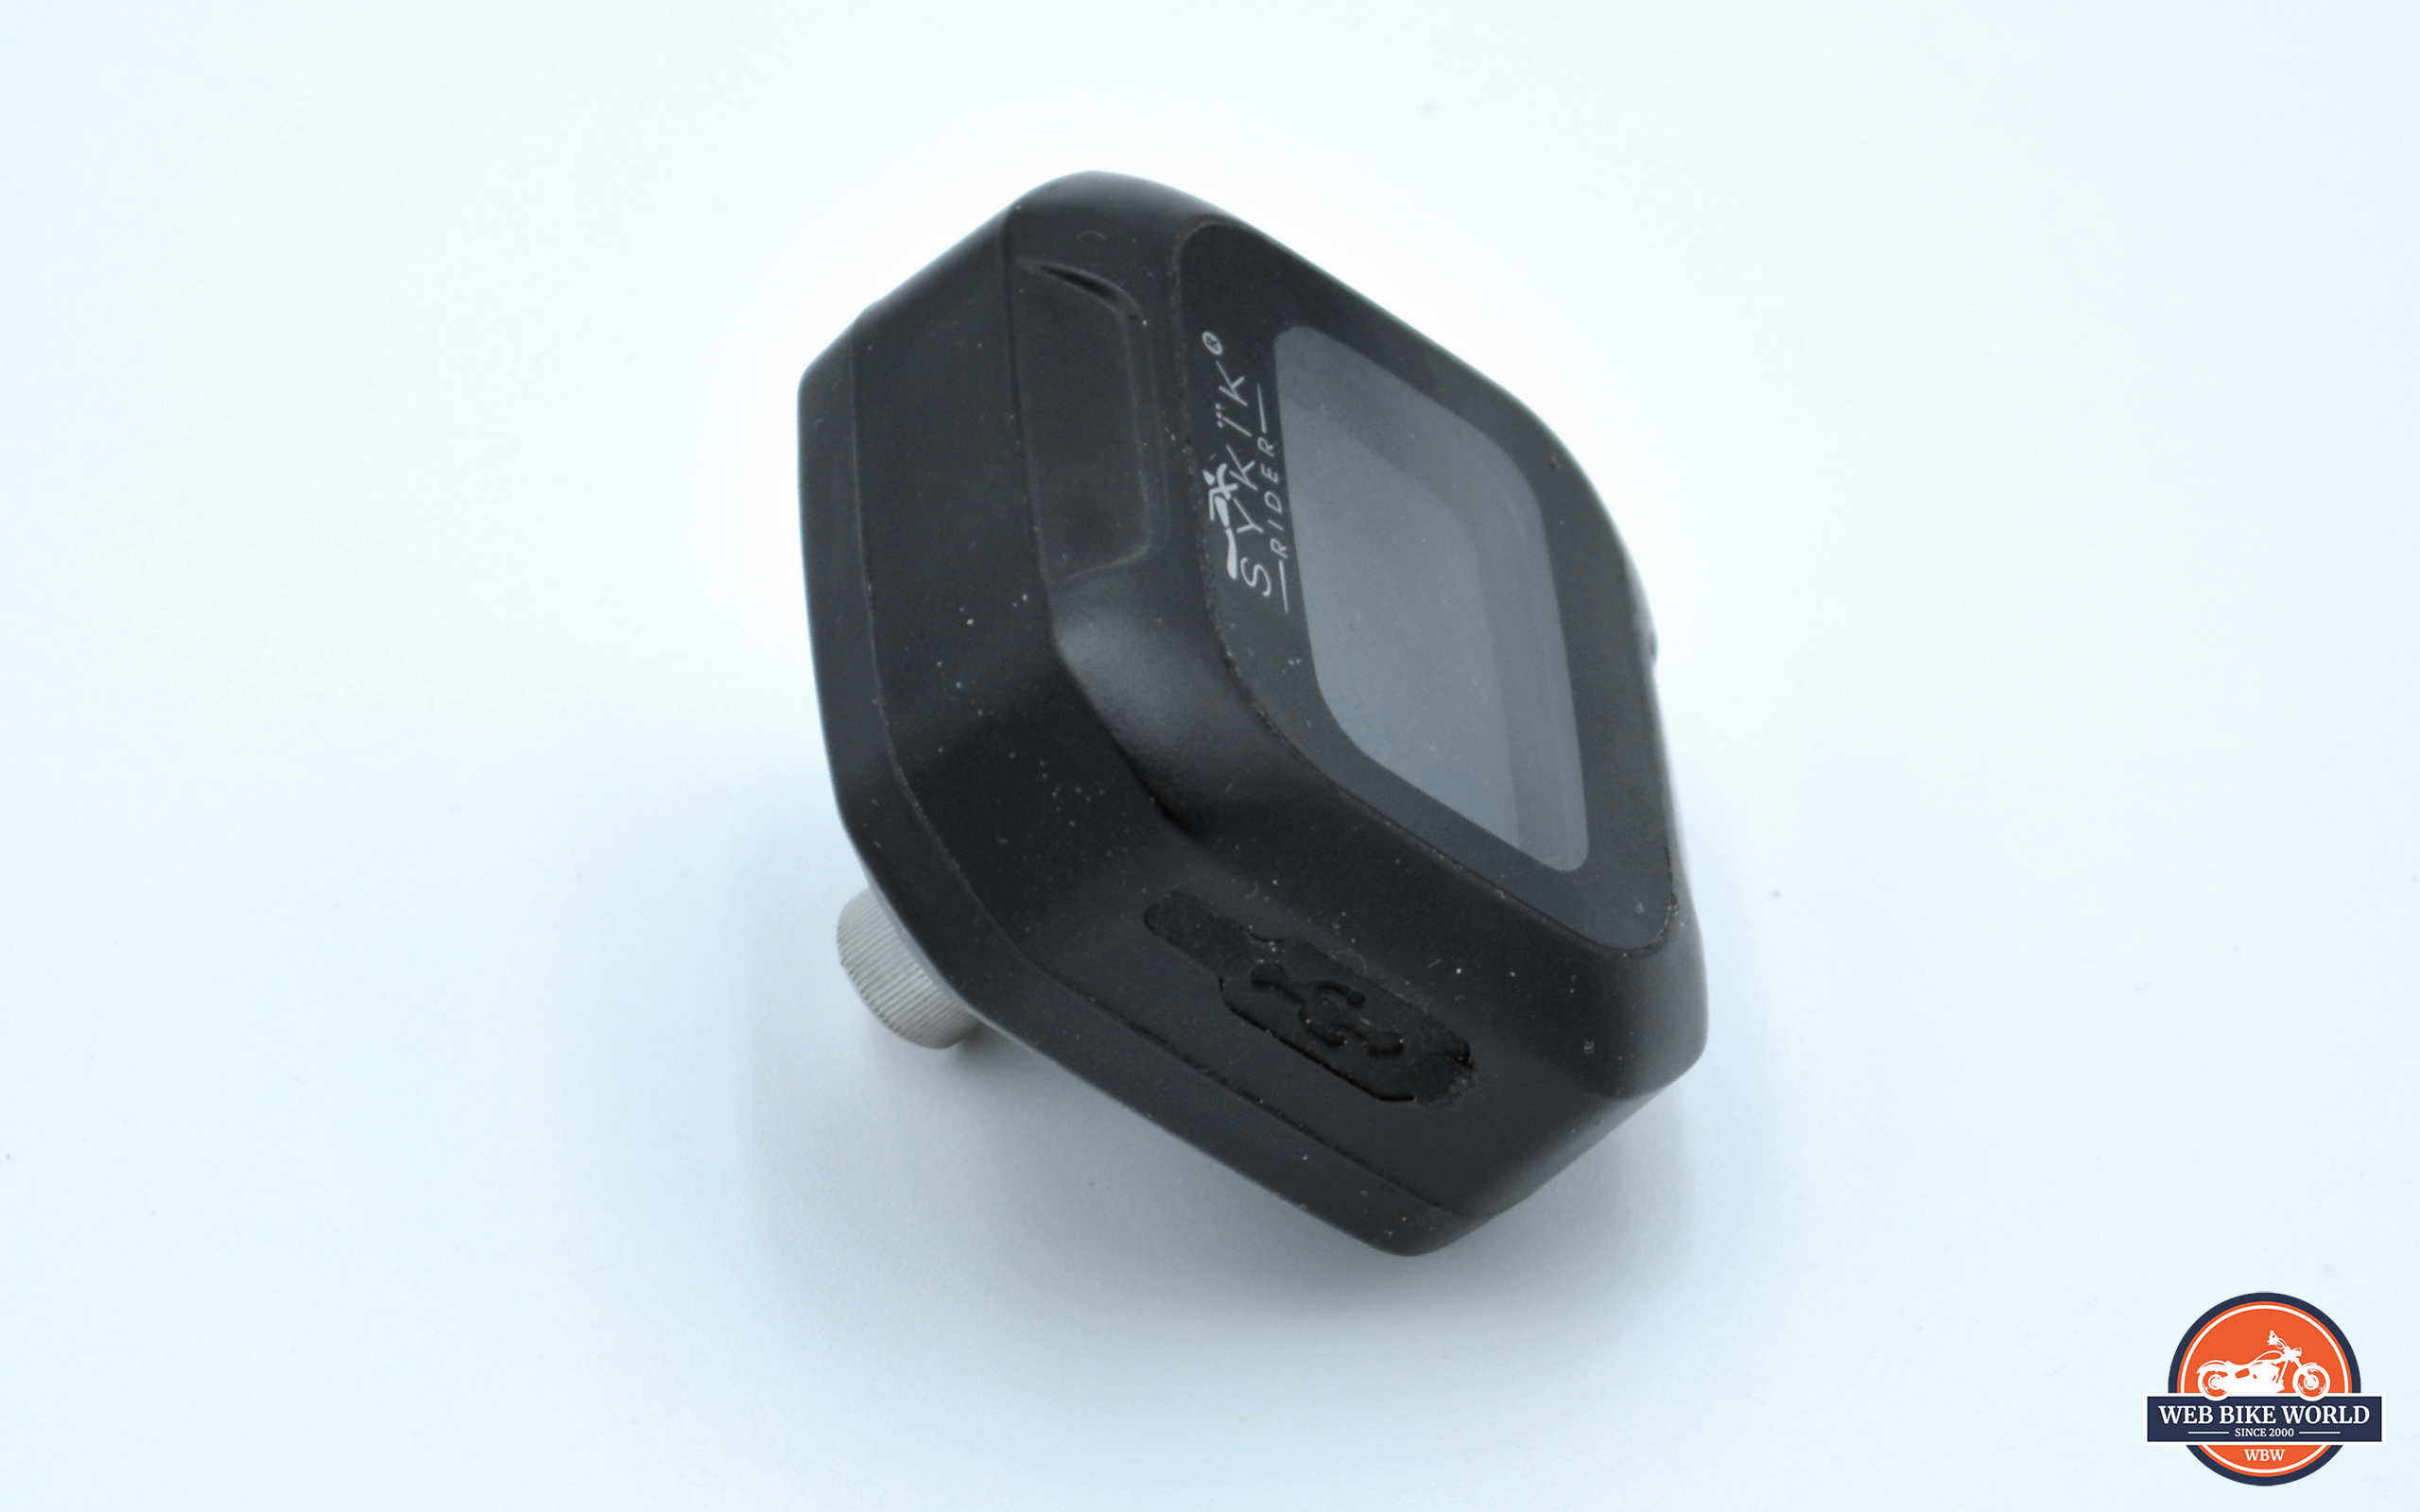
The right side has a rubber flap over the microUSB port for charging, making sure no water gets in if you ride in the rain
Overall, it feels really well made, has a clear display, and nice, tactile buttons.
Ease Of Use
Once you have the sensors on your wheel stems, and the handlebar stem tightened down and ready, all you need to do is charge up the display unit before you set off. Because it has a small battery and doesn’t need to do much more than power a wireless receiver and a display, it charges incredibly quickly on a standard 5V microUSB cable, one of which is included in the box, in the range of about 30 minutes for a full charge if you recharged it with one bar of its battery readout remaining.
To set up the system with the pressure sensors installed, you press the bottom right button for 3 seconds to turn the unit on, then press the upper right button “SET” five times. The unit will blink the pressure readout area, meaning it’s in pairing mode, and you then press the lower right button to select the tire you want to pair.
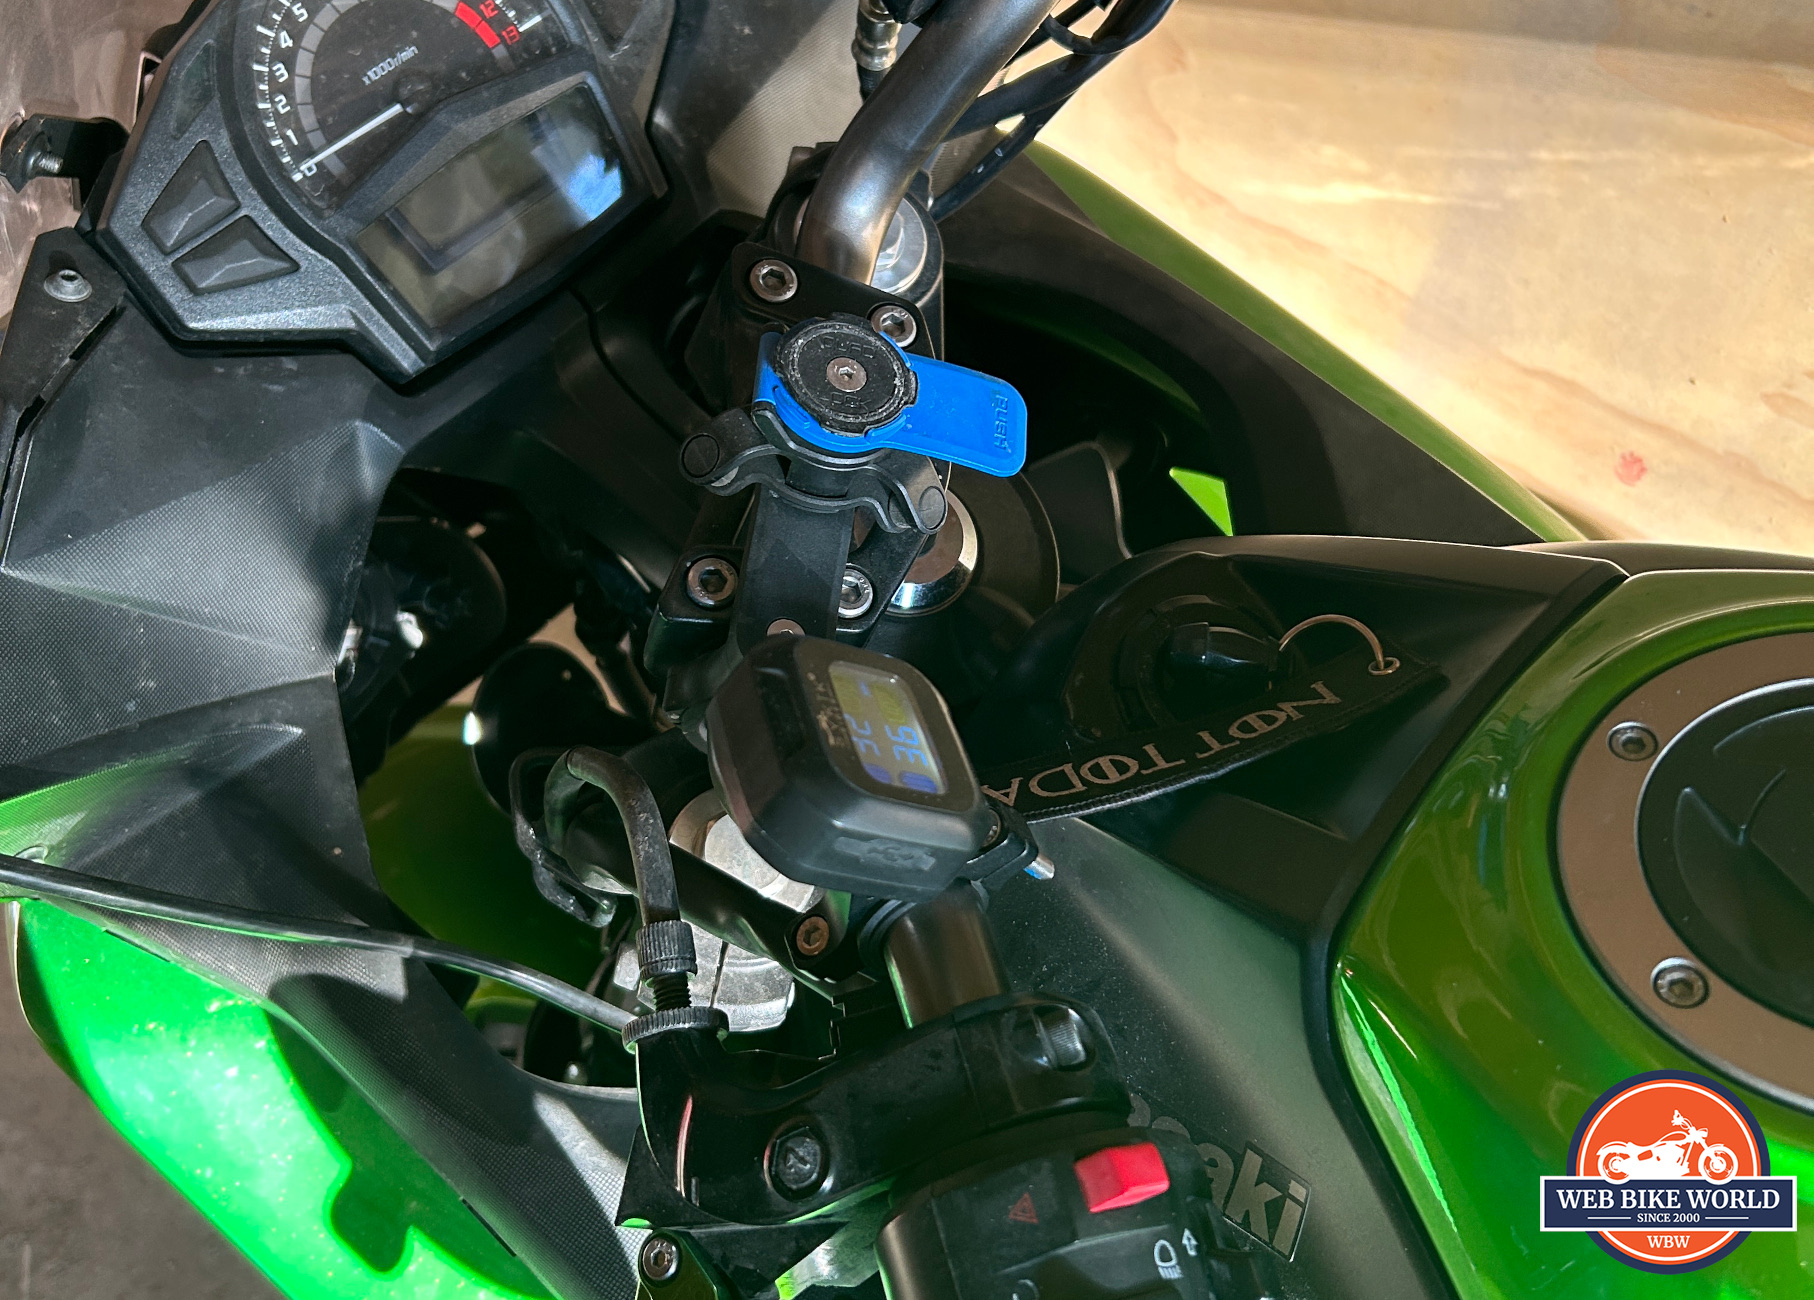
My handlebars with the display unit mounted and on. (Yes, I know there is a panel gap on the left, the little plastic tab inside snapped off in my first week of owning the bike in 2021
The unit will automatically search for the sensor, and once it connects, it will read out pressure and temperature. Once that’s done, while it’s still blinking, you press and hold SET for 5 seconds. Repeat the same procedure for the rear tire, pressing the bottom right button twice to find the rear sensor instead of the front, and voila, you’re ready to ride.
To change the readout units, which can be any combination of Metric and Imperial you want, simply press the SET button for a couple of seconds, click the bottom right button until BAR PSI or C F are displayed, then press SET, bottom right button to choose your unit, then press and hold SET for 5 seconds to save.
When Sykik stated that they wanted to make the unit extremely easy to set up and start riding with, they were not joking! I honestly had the sensors and stem installed while charging the display, then set up the unit as described above in a grand total of about 20 minutes. I am not the world’s greatest wrencher, and it takes me a few hours to do an oil change because of the filter’s location behind the exhaust headers in the most inaccessible place possible, and yet setting up the Sykik was almost easier than brushing my teeth that morning.
Major points for ease of use!
The Sykik SRTP-300 TPMS In The Real World
The first thing I encountered when I went riding after installing the SRTP-300 was that I noticed my rear tire was 2 PSI under the 36 PSI it should be. As I had brought along the little wrench from the package along, off to the gas station to give it a quick squirt of air to get it to the correct inflation.
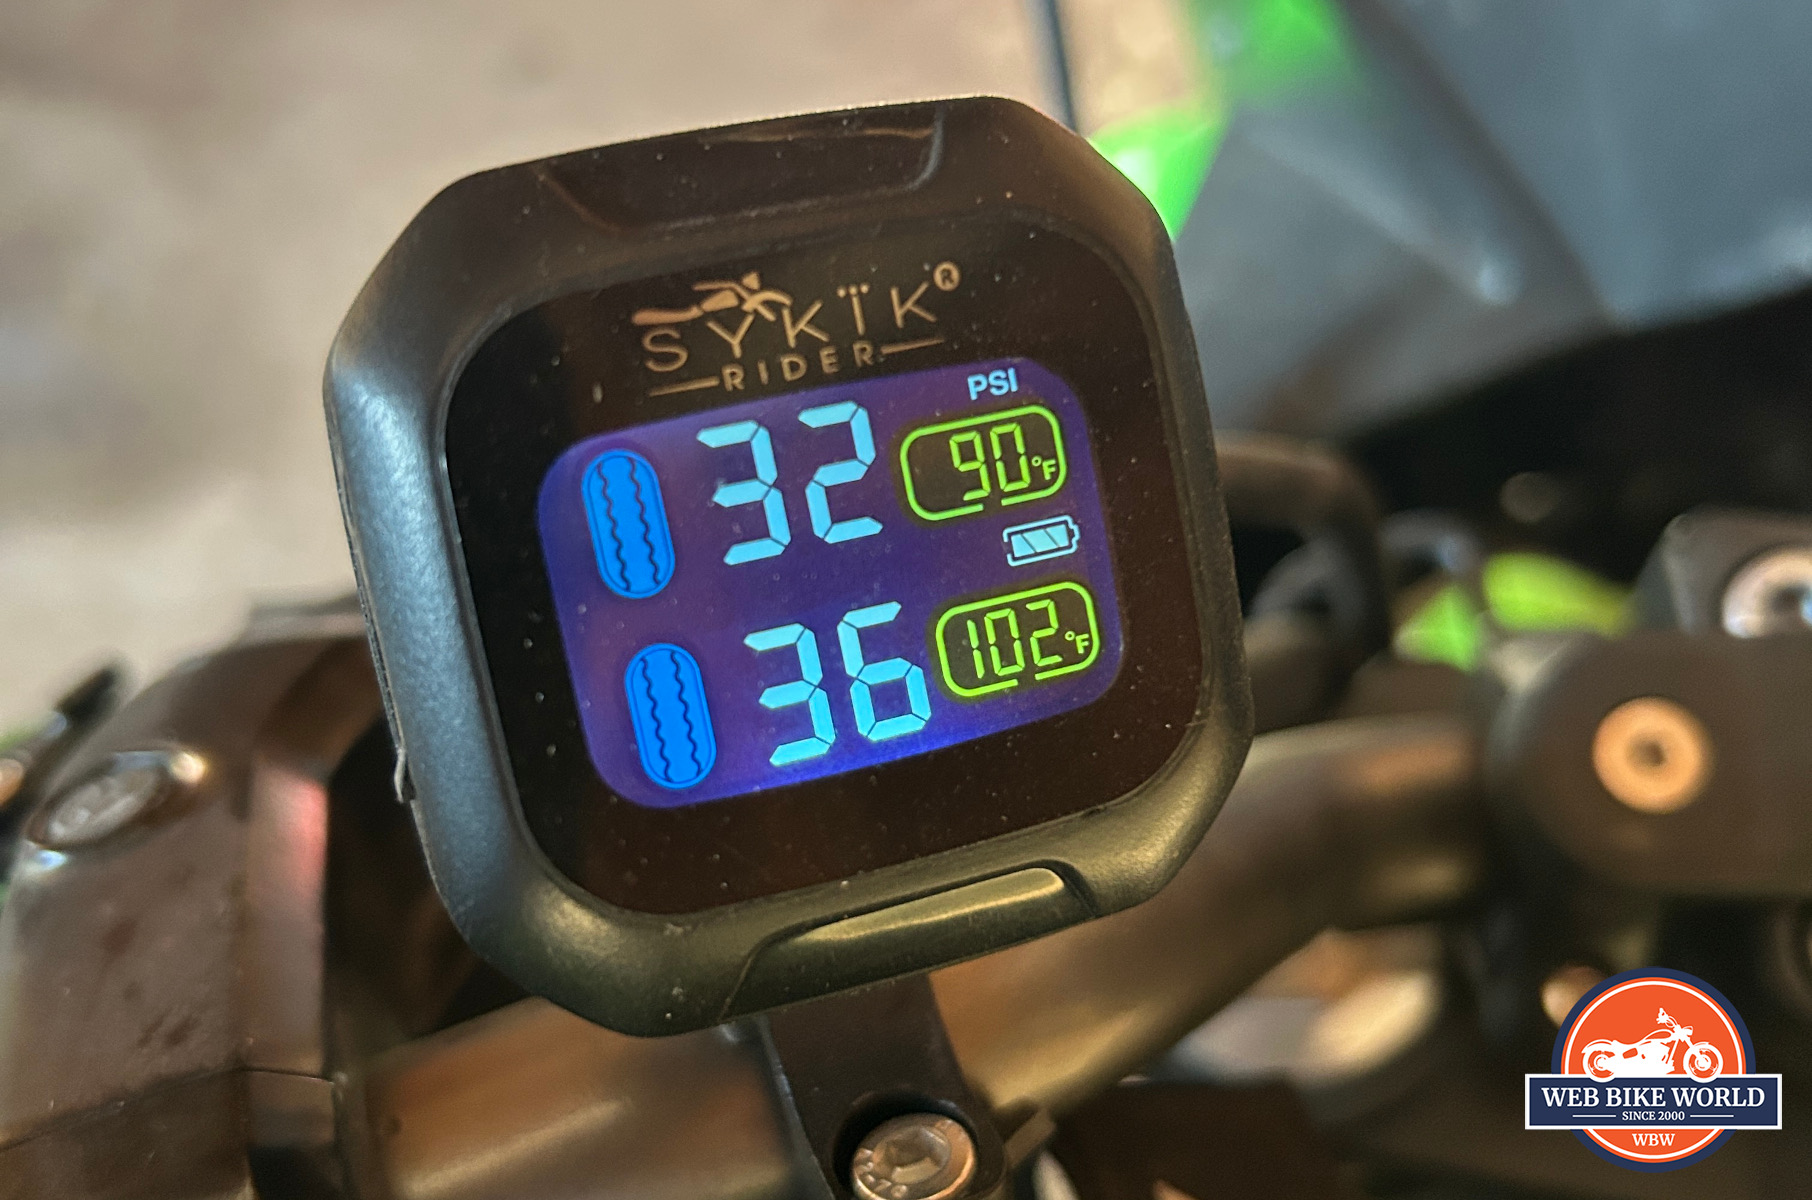
The display unit is very clear and concise. This is before setting off on the day it was 30+ C (86+ F) in the middle of the Summer, the tires were already that warm!
That, alone, provided me with all the reasons I needed to keep using the system, but as I had to do a full test, I continued riding. Throughout the 2023 season, we have had some of the wildest weather in Calgary, Alberta, Canada. We’ve had heat wave level temperatures soaring past 30 C (86 F), which for a Canadian is “bloody hot,” all the way down to chilly 5 C (41 F) nights that almost made frost appear on the grass.
Throughout it all, the thing I noticed the most when at a stop light and checking the display unit is how the air temperature inside the tires varied. While the cold PSI values were a constant 32/36 front to rear (the right pressures for my year of Ninja 650), the warm PSI values were almost always within a PSI of each other, at 38/42 front to rear.
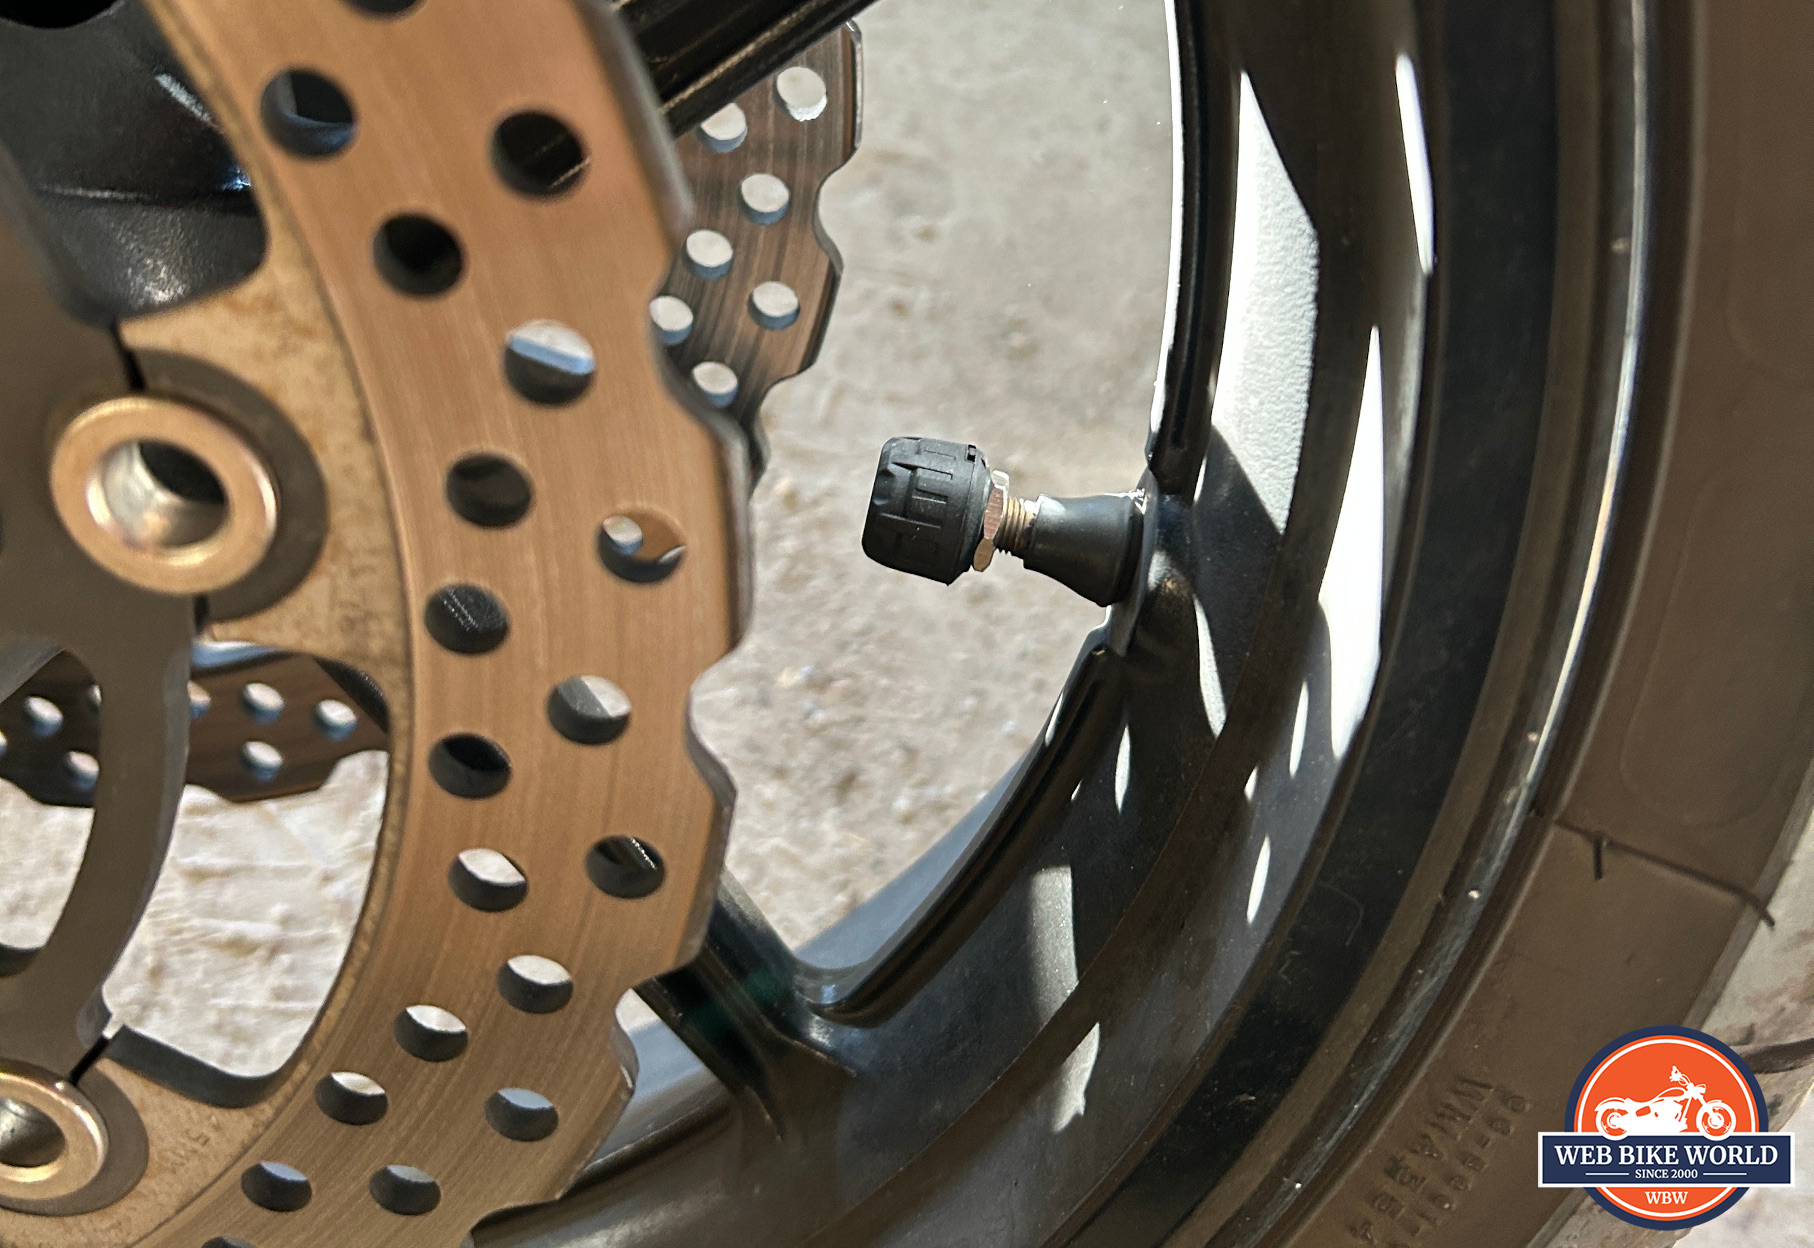
The front sensor was a bit harder to mount due to the brake discs, but it took all of about 2 minutes to get it all on there and tighten the nut back up against the sensor
Yet, the temperatures varied wildly, from as cold as 35 C (95 F) to 55 C (131 F), depending on the ambient temperature. It was a nice bit of insight into how much temperature and pressure can fluctuate while riding on the road! Also, for reference, I am currently on Michelin Pilot Sport Road 4 tires, which are quite decent sport touring tires. I suspect with a softer, more aggressive sport tire, the temperature would spike a bit higher on the hot days.
I was also able to test out the waterproofing of the unit by having to ride through a sudden thunderstorm that formed when I was more than 30 minutes away from my garage. Despite getting absolutely pelted by rain, it kept reading true the whole time and never once even thought about flickering.
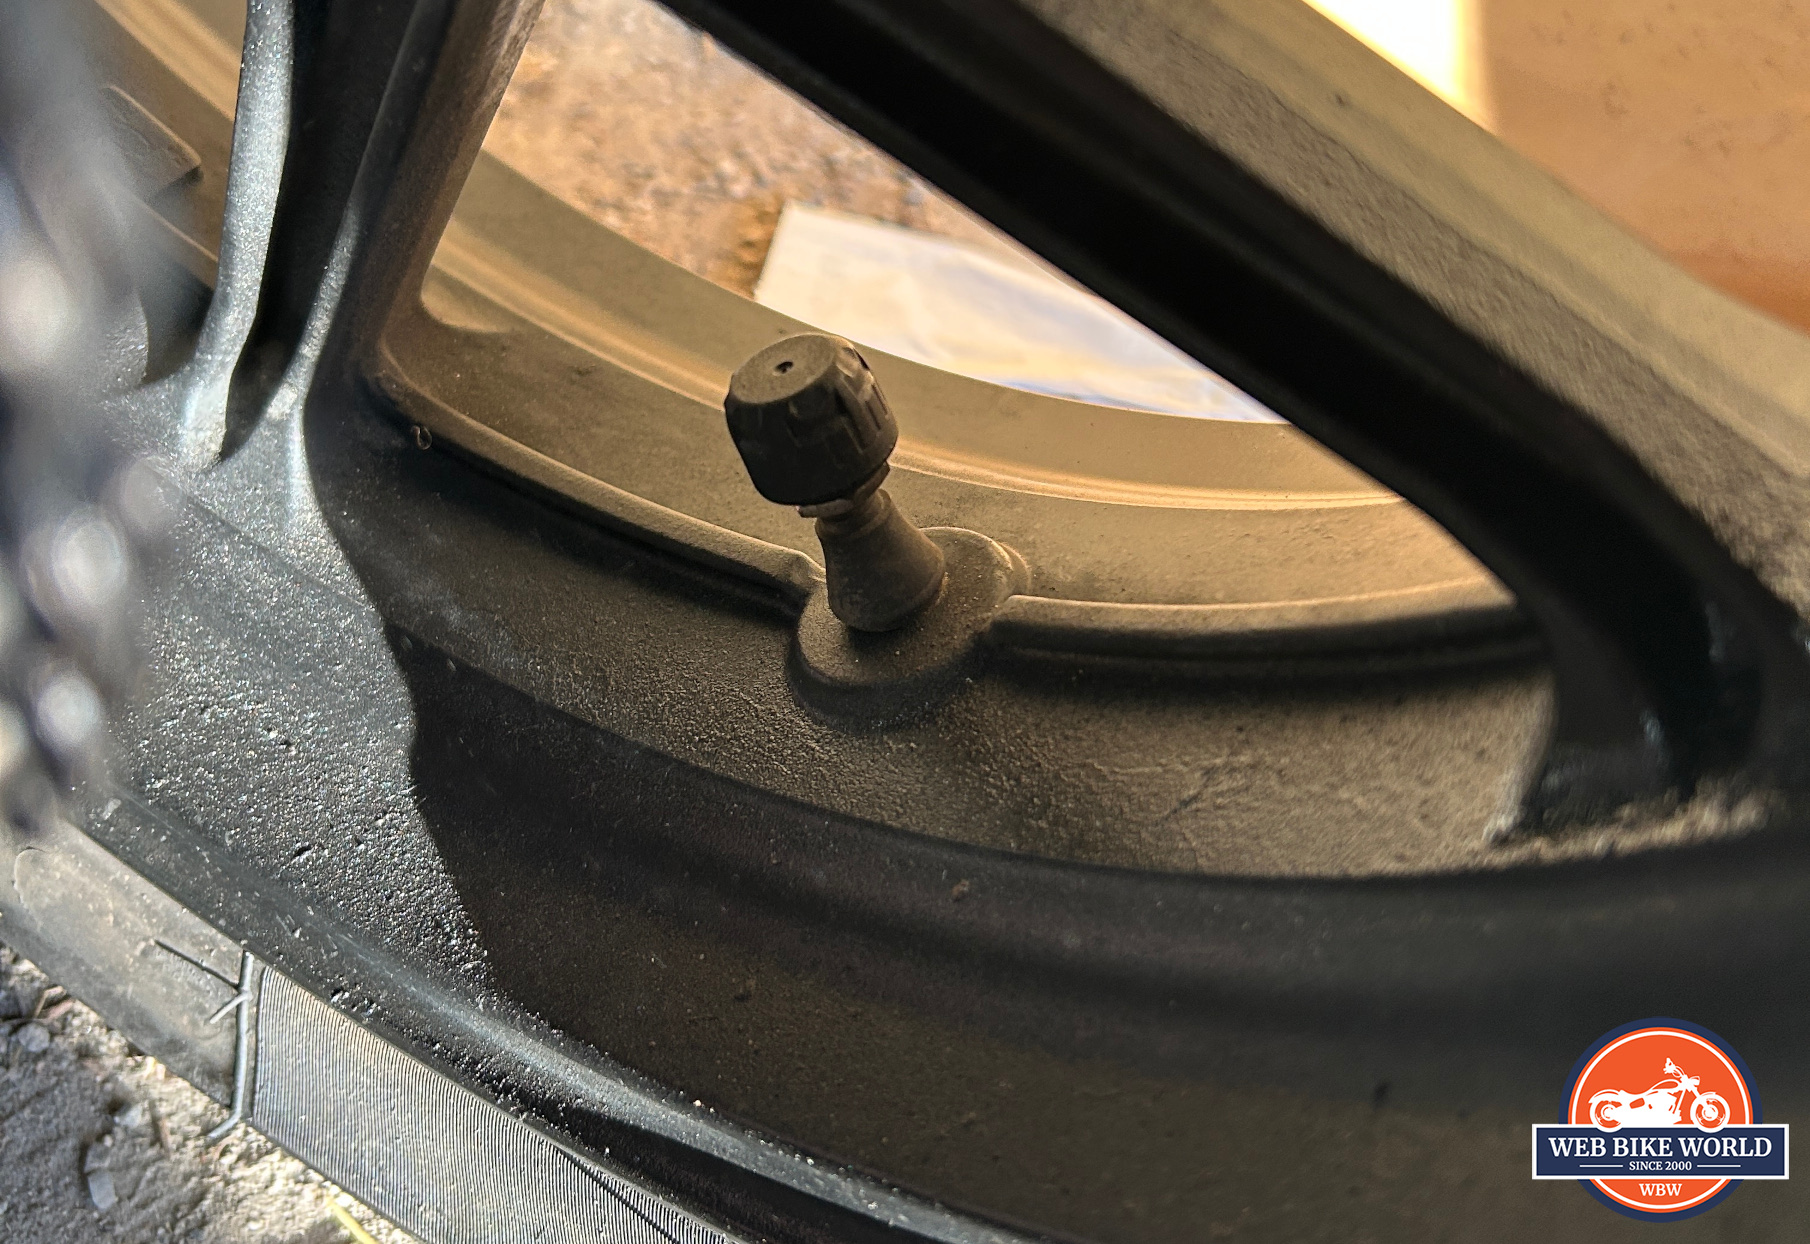
The rear sensor was a much easier install, took about 60 seconds total to get it on and the nut backed up against it
One of my main concerns about the whole setup the entire season was how the display unit attaches to its metal stem. While there is a ¼ inch screw that holds it in the stem, the only thing preventing it flopping around or spinning is a tension washer that has a fairly strong spring to it. Despite riding on some of the rougher roads around town, and demounting, remounting, and otherwise having to tighten and loosen it a lot for taking it inside to charge, that washer has stayed strong and the unit hasn’t budged.
That said, it has only been a season, and as with all things, including the bike, time and use does wear things down. I suspect at this rate that I’ll probably need to replace the washer in a season or two, as it isn’t immovable, just pretty strong with its spring-back force. Just as a shock absorber can wear out, so can that little washer.
Final Thoughts: A Useful, Affordable Accessory
For what it is, the Sykik SRTP-300 TPMS system, which is currently selling ~$77 straight from Sykik, does exactly what it says it does on the box. It won’t make waffles, it won’t magically add 15 HP to your bike, but it will accurately and reliably tell you your tire pressures and temperatures when you want to know them.
The only real hiccups I can see with the unit is if you have a handlebar that is thicker than 1.25 inches so you can’t squeeze the stem on, but even Sykik themselves say to use a bit of 3M adhesive backed Velcro on a flat surface in your dash area and it will happily work mounted flat like that.
Sykik has also been intelligent about how to power the unit and sensors. While the display unit uses a rechargeable battery that should last it a few years, the sensors use a tiny watch battery in an ultra-low-draw setup, and cost less than $5 to replace the batteries in both sensors.
It’s affordable, not cheap, because it works and does precisely what it was designed to do. In today’s world of trying to squeeze every last feature into a device, it’s refreshing to find something that just is what it is.
Basically, if your bike doesn’t have a TPMS system included, and you want that extra peace of mind that knowing your tires are at their optimal cold and warm pressures, for less than $80 you really can’t go wrong here.
The post Sykik SRTP-300 TPMS Review appeared first on webBikeWorld.
Continue reading...